Wednesday, August 11, 2010

piecemontee's SF4 Viewer Now Open Source!

Piecemontee is a swell guy who created one of the more vital tools to Street Fighter 4 modding, known variously as the SF4 Viewer or SF4 Asset Explorer. This tool allows modders to decompress SF4 files (no more offzip! yay!), extract textures (no more dragon unpacker! yay!) and obj models (unique to the Asset Explorer AFAIK...yay!), and then reinject modified versions of these assets back into the game (no more infuser! yay!). It also enables modders to view their work within the program instead of having to load the entire game up each time.

The version of the SF4 Viewer that is most widely used is 0.33, but piecemontee made some significant strides since that release and has since released another stable version (0.35) and an unstable beta (0.36ik; you can get these and other versions here). From piecemontee (regarding the unstable version):
[I]t includes preliminary animation display (open up .cmn.emz / .cos.emz and .col.emz then go to the EMO model to see a new combo to select the stance)
I tried to display BCM input commands as well but I don't remember how far I got I planned to allo input commands edition
Warning this version is buggy as hell and if I remember well you cannot resize the window after loading a model

Here's a screenshot of the animation viewer in action:
Yeah, it's a little fucked up, but it's a start!

In addition to these newer versions, piecemontee gave the modding community the best gift anyone could ask for: he opened up the source code for anyone to work on or add new features! The program uses DirectX 9 and pure Win32, so anyone who has experience with these APIs can head on over to SourceForge and check out the code, via mercurial.

Piecemontee told me that he doesn't have the time nowadays to continue hacking away at the SF4 Viewer. However, now that the source code is available, there is the possibility that someone will modify it to work with assets from Super Street Fighter 4 on Xbox360. According to a post over at the XeNTaX forums (from this thread), all it probably needs is for someone to switch the "endianness" (from big to small or vice versa, I guess) and it will be able to view/import things just fine. At that point, we should be pretty close to importing assets from SSF4 into vanilla. :D

If anyone wants more information on this or is interested in adding new features, feel free to leave a comment here, PM me on the Shoryuken forums (my handle there is hunterk), or give me a buzz via sf4mods.pbworks.com.

Sunday, July 18, 2010

Calibre E-book Library on Ubuntu Lucid with Amazon Kindle

Amazon just had a big sale on 2nd-gen Kindle E-readers, so I picked one up. I am completely happy with the reader and I love the screen, but I am not so happy with the relatively small number of file formats the Kindle supports. I have picked up quite a few ebooks over the years, mostly in Epub and .lit formats, but with sprinklings of a number of other formats, as well, none of which are natively recognized by the Kindle.

Luckily, there's a wonderful piece of software available, known as Calibre, which is capable of converting the vast majority of the myriad ebook formats into the digitally signed .mobi format that the Kindle loves so much.

In addition to the conversion capability, Calibre is essentially an ebook library management tool similar to what is available for music files, such as iTunes, winamp, etc., with support for metadata, covers and so forth. It also has syncing support for a variety of e-readers, including the Kindle, the iPad, Sony's E-Reader and more, though some require additional software support.

As far as I know, Calibre is the only software of its kind and it is, thankfully, free, open-source and multiplatform. You can download it here, or from Ubuntu's official repositories. If you get it from the repositories, though, be aware that it does not come it's own copy of libunrar.so, which will cause it to choke on compressed archives, such as .cbr comic book archives and any otherwise compatible ebook files contained within .rar archives, usually with an error something like this:
OSError: libunrar.so: cannot open shared object file: No such file or directory
This error will occur even if you the unrar and unrar-nonfree packages installed, and I am not aware of any packages that will provide libunrar.so. However, you can download a precompiled (32-bit) version here.

To install it, decompress the .tar.gz archive by right-clicking on it and selecting 'Extract Here.' This will decompress the archive into a directory that is misleadingly named libunrar.so (the real library binary is inside *that* directory). So, open a terminal, navigate to the newly decompressed directory and type:
sudo cp libunrar.so /usr/lib/
After that, you should be ready to run by either choosing it from the 'Office' section of the Ubuntu menu or by typing calibre into a terminal.

Once you get it up and running, the preferences are extensive. You can choose how it interprets metadata from filenames (I still can't get this configured properly for some reason; it always either pulls the names in wrong or swaps the names and the titles), how converted books are formatted and an array of other options.

You can set up an email address (or use an existing email server) to send books wirelessly to supported ereaders, but be careful if you own a Kindle because Amazon charges for anything that gets emailed to your device (15 cents per MB at the time of this writing). This in mind, I'll be sticking with USB transfers.

My personal favorite feature of Calibre is the Web interface, which makes your library available to you anywhere in the world via Web browser. To set it up, you just turn on the included Web server via Preferences > Content Server and set up a username and password to use for login. If you have a dynamic IP address (as is the case with most cable internet), you'll also need to get a static IP address from one of the many providers, such as dyndns.com, and port-forward port 8080 through your router. This server feature works well with the minimize-to-the-notification-area feature, which makes it less obtrusive while running in the background.

Furthermore, for people with an iPad, the free ereader app Stanza can connect to your Calibre Web library to sync, which is very cool.

What with the conversion, organization and available-anywhere-there's-internet server, Calibre is a pretty awesome piece of software. However, I do have some complaints:

No native .doc support
. It would have been really nice if Calibre could at least convert .doc files to other formats, presumably via an external library (similar to the rar support) or an API. Maybe the author could work out something like this. As it is, it just coughs up errors if you try to convert them and opens OpenOffice.Org if you try to view them.

Crashy as hell. Any time I try to do anything with a batch job, Calibre freezes and crashes. This is a serious annoyance, but I think it'll be fine once I get everything set up. I expect that, once I get everything tagged and converted to .mobi, I won't have to use any of the really destabilizing features--specifically, the batch stuff--with any regularity.

Wednesday, July 7, 2010

What's New In the Filthy Pants PPA

I originally created my Personal Package Archive (PPA) to distribute my SVN builds of HandBrake, which has worked out really well. However, I have since added a number of programs, the functions of which may be a bit esoteric to some, so I thought I would take some time to explain what each program does (in alphabetical order):

Anomos

An anonymous, encrypted BitTorrent client built using free and Open Source code. It uses an advanced, planned mix network to protect users' identities, though it will not magically make your illegal torrents safe.

The client routes packets through a number of intermediary nodes before they reach their final destination. The intermediary nodes cannot confirm what information their neighbors are sharing or whether they are the source of the information or simply a relay point. Additionally, all communication with both peers and trackers via Anomos is end-to-end encrypted.

Here's a screenshot:

BSNES

In the simplest terms, BSNES is an emulator for the Super Nintendo Entertainment System (SNES). However, it was written primarily by a determined individual known as byuu whose goal was to create the cleanest, most accurate SNES emulator in the world, using entirely from-scratch code (i.e., without reusing code from existing emulators, such as SNES9X).

BSNES is so accurate, in fact, that it has reached nearly 100% compatibility with commercially produced games--even the ones with crazy, specialized chips, like Star Ocean--without the use of buggy, game-specific speed hacks.

Unfortunately, great accuracy comes at the price of insanely high hardware requirements: to get full 60 fps, users will need a high-clocked Core2Duo or AMD Phenom/Athlon II cpu.

BSNES supports a number of attractive video filters, including HQ2X and SuperSAI, as well as OpenGL-based pixel shader filters with compatible graphics cards and drivers.

I include 3 separate packages for bsnes in my PPA: the standard Phoenix/GTK-based GUI (bsnes-gtk), the older, now-deprecated Qt GUI (bsnes) and an optimized build of the Qt GUI (bsnes-sse2).

Here's a screenshot:

Curse

Another piece of software from BSNES author byuu, Curse is a barebones, no-frills hex-editor. It must be invoked from the command line (e.g., curse [file to edit]) but will then open a window displaying the hexadecimal data. Like BSNES, Curse's code is written with a focus on cleanliness and efficiency. It's missing some features that would be handy, but it's still one of the only programs of its kind on Linux that doesn't require Mono....

Here's a screenshot:

Dolphin-Emu

Dolphin-Emu (not to be confused with Dolphin the file manager) began its life years ago as a Nintendo GameCube emulator. When Nintendo decided to keep the Wii's architecture relatively unchanged from that of the GameCube (the proverbial "two GameCubes duct-taped together"), the emulator was adapted to work with Wiimotes via bluetooth and Dolphin-Emu became the first game console emulator to play commercial games at full speed during the life cycle of the console.

In addition to full-speed emulation of many commercial games, Dolphin-Emu offers support for high-definition upscaling of graphics, along with high-resolution textures and support for shader-based filters.

Here's a screenshot of it playing Ikaruga:

HandBrake

A highly useful video transcoding tool designed originally to rip DVDs but later updated to support transcoding of nearly any file that can be decoded by FFmpeg/libavcodec.

The program is geared mostly toward the use of the open-source x264 codec, but it also supports FFmpeg's mpeg4 and Ogg/Theora codecs. It also supports AC3 and DTS passthru, as well as support for soft subtitles and some support for vobsubs.

My packages are updated whenever major features are added or codecs are updated.

Here's a screenshot:

HandBrake-QT4

This was an attempt by a fellow named gonza to update HandBrake's extremely deprecated QT4 GUI code to something functional. Unfortunately, he didn't stick with it long enough to satisfy the other HB devs and his code was never included in the official SVN repository.

This package is here in case anyone wants to use it, though it is sorely outdated.

LibWiiUse

This is a library used to interface with Wiimotes via bluetooth. It is required by Dolphin-Emu and is supposed to be built automatically as part of its build process. Unfortunately, this did not work on the Launchpad build farm, so I just bundled it separately and included it as a dependency for Dolphin-Emu.

NEStopia

This is a build of the highly accurate, cross-platform NES emulator, NEStopia. This emulator is cycle-accurate and supports some nice filters, including blargg's awesome NTSC filter, which is also available in bsnes.

Here's a screenshot:

Nvidia-Cg-Toolkit (no longer available)

This is a set of proprietary libraries and tools created by Nvidia. They are used in several modern emulators, including Dolphin-Emu and PCSX2. Since the source code is not available for these tools, the package contains the binaries for both i386 and AMD64 architectures, and the appropriate ones for your system will be copied into the appropriate directories.

PCSX-DF

This is a Debian fork of the popular PCSX Sony Playstation emulator. It is highly compatible with commercial games and uses plugins to add features and functionality. This is a more recent version than the one included in the Ubuntu Universe repository.

pcsxr

Another fork of PCSX, this variation has a bit more active development.

Here's a screenshot:

rtmpdump (no longer available)

This is a toolkit for RTMP streams, with all forms of RTMP supported, including rtmp, rtmpt, rtmpe, rtmpte and rtmps. In addition to rtmpdump, this package includes the server programs rtmpsrv and rtmpsuck. These tools can be used to listen in on rtmp server handshakes and give access to unencrypted streams. This allows users to download encrypted and obfuscated streams, such as those used to stream television shows from network websites (e.g., southparkstudios.com).

snespurify

This tool automatically removes headers from ROM images and is a must-have for use with bsnes' Phoenix/GTK GUI, which does not support libsnesreader and all of the fancy file formats that entails (.smc and all of the other myriad SNES file extensions, as well as compressed archives). This version presents a fancy, polished GUI that facilitates large-scale, batch purification.

Here's a screenshot:

Upset

Yet another piece of software from BSNES author byuu, Upset is a lightweight UPS patcher for use by ROM-hackers. As with his other software, Upset's code is focused on portability and cleanliness.

VBA-M

An actively-developed variant of the popular Gameboy Advance emulator, VisualBoy Advance. It has a nice GUI and performs a bit better than the standard VBA package.

Here's a screenshot:

VLC (no longer available)

This media player is based on FFmpeg/libavcodec and will play almost any video file you throw at it, without the need for external codecs. While there is already a package included in the official Ubuntu repositories, this updated version includes support for Google's WebM format.

Wednesday, June 23, 2010

Nvidia 256.35 Driver on Ubuntu 10.04 Lucid Lynx

(If you just want installation instructions, skip down to the section labeled 'How to Install It')

I don't normally devote entire blog posts to something as trivial as a driver update. In fact, I usually don't update my proprietary driver blob until Ubuntu updates its packages and pushes them out through the software update tool, but this particular driver update has brought about a couple of major changes (for me) that I thought warranted stepping out of my comfort zone a bit.

These features are:
1.) From Nvidia's website, "Fixed an interaction problem between Compiz and 'screen-scraping' VNC servers like x11vnc and vino [ed.: the VNC server that Ubuntu uses by default] that caused the screen to stop updating."

This bug has been around since Hardy Heron and has been a thorn in my side. The only workarounds were to use a different VNC server (big hassle), constantly close/reopen the VNC connection to manually refresh (even bigger hassle), or switch to metacity instead of Compiz whenever you want remote access (not a huge hassle, but still inconvenient).

2.) The driver now supports overscan compensation (via a slide-control in the nvidia-settings application) for displays that have overscan issues, though this isn't mentioned in the changelog specifically.

This feature has been in the Windows driver control (and the Linux Catalyst driver for ATI users) for a very long time, but it is new for the Linux Nvidia driver and solves another long-standing issue for me. Now, I no longer need to cover the screen edges with transparent GNOME panels to keep new windows from drawing offscreen or worry about toolbars getting chopped off of fullscreen applications. W00t! (Edit: overscan compensation has been in the driver since Karmic, but it never showed up for my specific card until this latest driver).

The new driver also includes a host of new VDPAU improvements, which always a good thing.

How to Install It

Update (7/27/10): If you don't feel like doing all of the steps I have laid out, there's a handy PPA provided by the same cats who package the standard Ubuntu graphics drivers that has a package for the 256.35 driver. You can find it here. Whether you use the PPA or my steps, the Bonus sections below are still applicable and handy.

I have an Nvidia 8600 GT graphics card and, when I first tried to install the driver, I followed the procedure that has always worked in the past of simply downloading the installer, dropping down to console, and running the installer. However, when I tried that, the installer failed with the error "THE DISTRIBUTION-PROVIDED PRE-INSTALL SCRIPT FAILED." Others have apparently also gotten another error, which I will include here for search engine purposes: "Error: Unable to load the kernel module 'nvidia.ko'. This happens most frequently when this kernel was built against the wrong or improperly configured kernel sources, with a version of gcc that differs from the one used to build the target kernel, or if a driver such as rivafb/nvidiafb is present and prevents the NVIDIA kernel module from obtaining ownership of the NVIDIA graphics device(s), or NVIDIA GPU installed in this system is not supported by this NVIDIA Linux graphics driver release."

In either event, these steps should clear things up:

1.) First, we'll gather some resources: download the driver from Nvidia's website and put it somewhere, such as your Home directory. Then, open a terminal and type:
sudo aptitude install linux-headers-`uname -r` build-essential nvidia-settings
2.) Now, we need to get rid of some modules that conflict with our soon-to-be-installed proprietary driver. So, in a terminal, type:
sudo gedit /etc/modprobe.d/blacklist.conf
Scroll down to the bottom and copypasta these lines:
# Allows proprietary Nvidia driver to install
blacklist vga16fb
blacklist nouveau
blacklist rivafb
blacklist nvidiafb
blacklist rivatv
Save and exit.

3.) Next, we need to clear out any previously installed Nvidia drivers, so (still in a terminal) type:
sudo apt-get remove --purge nvidia-*
4.) Reboot and, when the error window pops up saying Ubuntu can't load drivers blah, blah, blah, choose to 'Exit to console,' and it should dump you down to a command prompt. Login and navigate to the directory where you put your Nvidia driver installer from Step 1 (if you put it in your Home directory, you should already be there upon login).

5.) Start the Nvidia driver installer by typing (hint: you can use the TAB key to autocomplete instead of using the * wildcard character):
sudo sh NVIDIA-*
When it asks if you want it to automatically configure things, select 'yes' and it will auto-generate an xorg.conf file with the appropriate fields.

Reboot again and everything should be hunky dory (if not, and your installation still poops out, scroll down to the bottom of the post for some more things you can try).

Bonus Points

Unfortunately, if you install the driver this way, each time a new kernel update comes down the pipe, your Nvidia driver will stop working and have to be reinstalled, which can be a big bummer. However, you can set up a script that will run anytime the driver needs to be reinstalled:

1.) First, we'll move our Nvidia driver installer to a safe location. In a terminal, navigate to wherever it is and type (again, use TAB to autocomplete instead of the wildcard):
sudo mv NVIDIA-* /usr/src
2.) Next, we want to make a symlink (kinda like a more powerful shortcut) to the installer so our script won't need to be rewritten any time a new Nvidia driver comes out. In a terminal, type:
sudo ln -s /usr/src/NVIDIA-* /usr/src/nvidia-driver
Now, since our script will reference the 'nvidia-driver' symlink we can just overwrite the old driver and make a new symlink using the same name if there's a driver update.

3.) Now for the script itself. Open a text editor and, in a new file, copypasta this:
#!/bin/bash
#

# Set this to the exact path of the nvidia driver you plan to use
# It is recommended to use a symlink here so that this script doesn't
# have to be modified when you change driver versions.
DRIVER=/usr/src/nvidia-driver


# Build new driver if it doesn't exist
if [ -e /lib/modules/$1/kernel/drivers/video/nvidia.ko ] ; then
echo "NVIDIA driver already exists for this kernel." >&2
else
echo "Building NVIDIA driver for kernel $1" >&2
sh $DRIVER -K -k $1 -s -n 2>1 > /dev/null

if [ -e /lib/modules/$1/kernel/drivers/video/nvidia.ko ] ; then
echo " SUCCESS: Driver installed for kernel $1" >&2
else
echo " FAILURE: See /var/log/nvidia-installer.log" >&2
fi
fi

exit 0

Save the file with the name update-nvidia and exit the text editor.

4.) Now, we want to make our script executable, so, in a terminal, navigate to wherever you made your script and type:
chmod a+x update-nvidia
5.) Finally, we need to install it. Still in your terminal from the last command, type:
sudo mkdir -p /etc/kernel/postinst.d ; sudo install update-nvidia /etc/kernel/postinst.d
Now, you should be all set. Whenever you install a new kernel, this script should kick in and install the Nvidia driver for you.

Even More Bonus Points

Now that we've got our driver installed and ready to update itself, we should consider our power consumption! Usually, the Nvidia driver will default to a power profile that always leaves your card running full-tilt, which sucks battery life and raises your utility bill. Thankfully, there's something we can do about it.

Open up a terminal and type:
sudo gedit /etc/X11/xorg.conf
This will get us into the auto-generated configuration file created by the driver installer.

Scroll down to the Nvidia driver section (you can tell it's the right section because it will be labeled 'Device,' the 'Vendor' field will say 'Nvidia,' and the 'Driver' field will say 'nvidia') and add these three lines:
Option "RegistryDwords" "PowerMizerEnable=0x1; PerfLevelSrc=0x3333"
Option "Coolbits" "1"
Option "OnDemandVBlankInterrupts" "True"
Save the file and exit.

In the first line, the PowerMizerEnable switch tells the driver that we're interested in using the dynamic clocking features (this switch may not be entirely necessary, as PowerMizer is supposed to be enabled by default, but it can't hurt anything and may be required for some cards/cases), while the PerfLevelSrc field tells it which performance level we want to use. The 0x3333 setting means we want dynamic, on-demand clocking for both battery and AC power.

The second option we added enables the 'Coolbits' feature, which lets us manually control the clock and memory speeds on our card via the nvidia-settings application.

The third option enables a checkbox in the nvidia-settings application to allow or disallow vBlank interrupts. Allowing them (checking the box) reduces the number of wakeups from idle, and thus reduces power consumption somewhat.

Now, in my case (8600 GT), there is only one performance level and dynamic clocking does nothing (you can find out your performance levels by typing in a terminal: nvidia-settings -q GPUPerfModes -t). This really stinks, since I do all of my gaming in Windows and all I really need my video card for in Ubuntu is compositing and fancy desktop effects. With this in mind, I used the Coolbits option via the nvidia-settings application to drastically underclock my card. It now runs at approximately 150 mhz on the core clock and 180 mhz on the memory, which generates far less heat and uses way less power than before. Compiz still looks great and has no performance issues, even while playing HD video, rotating the desktop cube with 3D windows, etc.

If Installer Still Fails
(I didn't have these problems, so I didn't try these instructions myself. They are only here in case you need them)

So, if the above instructions didn't work, we still have some things we can try:

1.) Drop back down to the command line (by pressing Alt+F1), login and type:
sudo gdm-stop
and then
sudo apt-get remove --purge xserver-xorg-video-nouveau
2.) Now, we need to fiddle with some blacklisted framebuffer stuff, so type:
sudo nano /etc/modprobe.d/blacklist-framebuffer.conf
Once in, we need to comment out (put a # in front of) blacklist vesafb and add a new line that says:
blacklist vgafb16
Save and exit (hit ctrl+x).

3.) Now, type:
sudo nano /etc/initramfs-tools/modules
Scroll down to the bottom and add these two lines:
fbcon
vesafb
Save and exit, then update the initramfs by typing:
sudo update-initramfs -u
4.) Now, we need to tell grub about our framebuffer, so type:
sudo nano /etc/default/grub
Once in, search (ctrl+w) for GRUB_CMDLINE_LINUX= and add either vga=771 or vga=795 (which one you'll add depends on your resolution, so for now, just pick one). Save and exit, then update grub by typing:
sudo update-grub
If things are messed up, you can redo the above step using the other vga value to hopefully correct things.

Now, once you reboot, you should be able to pick back up from Step 4 in the original instructions and install the Nvidia driver normally without any further errors.

Monday, May 24, 2010

Comparison of WebM/VP8 and x264 High Profile

So far, all of the comparisons I have found between WebM--Google's newly minted standard for video/audio encoding that will hopefully be patent-free--and h.264 have suffered from several problems:

1. Objective measurements of VP8 have focused on PSNR, which is a deeply flawed way to measure video quality and to which VP8 was specifically tuned to conform (more on this later in the post).

2. VP8 has has only been compared with inferior commercial h.264 encoders and not with x264, which is free, open-source and the best h.264 encoder in the world.

3. VP8 has only been compared with baseline h.264 and not to high profile, which has substantially better performance and quality. There is a reason for this, which I do not agree with and will cover more later in the post.

For these reasons, I have conducted my own comparisons of WebM (using ffmpeg with Google's own patches, set to preset 360p) vs. x264 baseline and high profile, with settings tweaked to achieve the highest quality. I used videos which exemplified both clean and grainy clips of both animation and live action and which are freely available from Archive.org (downloaded in mpeg2 format). For x264, resolution was reduced to the closest anamorphic value to 360p possible (368p), and I used single-pass 'target size' to closely match the size of the VP8-encoded videos. Since the WebM specification includes both VP8 video and Ogg audio, the x264 encodes also included audio encoded to the same bitrate (64 kbps using the 360p preset). Both codecs achieved adequate and comparable encoding speeds, which were faster-than-realtime (except on extremely grainy content, which slowed the high profile encoding down considerably), so I won't include those numbers here. If you disagree with these methods, feel free to conduct your own tests. Links to download the source videos are in the headings.


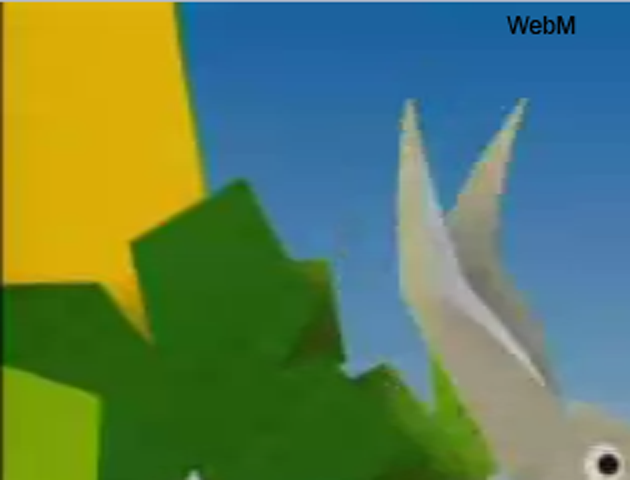
This was actually the worst test for VP8, with visible banding on the color gradients and a disappointing loss of detail on the textures as compared with both baseline and high profile. Interestingly, baseline did a better job of avoiding jaggies on the bunny's ear than even high profile, and high profile seemed to introduce some artifacting in places, such as the butterfly... It doesn't really surprise me that x264 did so well in this test compared with VP8, since it has recently gotten some amazing improvements for animation.


High profile really earned its keep with this grainy source material by maintaining detail and avoiding introducing artifacts. Baseline kept more grain intact than VP8, but VP8 ended up with a sharper gremlin. Between VP8 and baseline, I call this one a tie.


Again, high profile really stands out in this sample with regard to the bright light. In contrast, both baseline and VP8 show some banding and blockiness, but are otherwise pretty similar. However, baseline seems to have introduced some wonkiness to the door by the upper-left corner of the '58' that's a bit troubling. Overall, both baseline and VP8 performed admirably in this test and were only slightly worse than high profile.


All three results were surprisingly similar in this test, with high profile managing to keep a bit more detail on the handwritten notes (you can barely see the notes are there at all on the VP8 and baseline encodes). I was impressed with how well VP8 does with the large text on the sign, with good, clean lines and crisp edges, though the pic itself is a little blurry overall.


Once again, high profile demonstrates its superior handling of fine details in this sample, both with regard to the film grain and the multitude of small, moving waves. Both baseline and VP8 provide a similar loss of detail relative to high profile, but VP8 seems to have introduced some odd color distortions (a couple of faint, greenish blotches) that push it below baseline insofar as quality is concerned. However, the Penn Museum watermark looks absolutely exquisite on the VP8 encoding, even surpassing high profile. The whites are whiter, the edges sharper (though there are some visible over-sharpening artifacts around the outside).


High profile came out on top in this high motion scene, but not by as large of a margin as I had anticipated. Both VP8 and baseline only produced a small amount of banding on the gradients, though VP8 seems to have maintained slightly more detail in the motion-blurred parts as compared with baseline. As before, the Penn Museum watermark looks way better in the VP8 encode than in either x264 encode.

Conclusions

Overall, WebM isn't bad but it isn't great either when compared with x264. The popular sentiment that its visual quality is better than baseline h.264 does not seem to be true when compared with x264, though the difference usually isn't terribly large (and it manages to win a few, too). High profile h.264 obviously performs significantly better than either baseline profile or WebM in certain applications (film grain and large patches of water come to mind), while differences in other applications are scarcely discernible. Additionally, one area where VP8 beat the pants off of even high profile x264 was onscreen text, so good work on that one fellas.

Other Thoughts (tl;dr)

Leading up to this comparison, I did quite a bit of reading from other sources and I saw several arguments repeated over and over, so I want to take some time to address them:

Something that keeps getting thrown around in defense of VP8 is that it's a new codec. Unfortunately, it's not. VP8 has been in development and use by On2 (the company that developed it and was later purchased by Google) for years and, while there is apparently still much room for optimization (i.e., to make it faster and less resource-intensive), it is far from "new."

Additionally, all previous comparisons have purposely confined h.264 to baseline profile. This is because "all hardware" only supports baseline profile, so to go any higher would require new hardware and--the line of reasoning goes--if you're making new hardware decoders anyway, it would be just as easy to support VP8 as to support the high profile. This is a specious argument for two reasons: 1.) plenty of hardware already supports high profile h.264 (e.g., Western Digital's TV Live device, as well as many BluRay Disc players) and 2.) if you're going to revamp hardware, why would you go through all that trouble for the "same" comparatively shitty quality (i.e., baseline vs. VP8)? Why not go for the best quality available (i.e., high profile h.264)? The reason, of course, is freedom from licensing fees, but that's a different argument.

I've heard many people say that VP8 is *objectively better* than h.264, based on PSNR measurements. It's true that PSNR is an objective measure, but it only vaguely matches up with human perception. This fault was made painfully clear once psychovisual optimizations were added to x264: although the video output unquestionably improved, PSNR values plummeted. Why does this matter? VP8 was designed to achieve high PSNR values, which left a side-effect of preferring blurrier videos. An analogy for this is the kids who score high on the SAT because they've been taught according to its format, but they can't write a coherent essay.

I've also seen quite a few comments stating that "Google wouldn't have spent $124 million on crap." I have issues with this statement because 1.) VP8 obviously isn't crap, but that doesn't mean it's the cat's pajamas either and 2.) just because Google is chock-full of smart people doesn't mean they are infallible.

Now, the patent issue is certainly something to be concerned about, and Dark Shikari addressed his suspicions during his assessment of VP8. VP8 is very similar to h.264 in a lot of ways, according to his investigation, which could be worrisome. However, his assessment is also encouraging in some ways in that the differences between VP8 and h.264 imply that On2 was cognizant of the various patent pitfalls and was actively avoiding them. For instance, Dark Shikari noted that VP8 is missing B-frames, which is an awful shortcoming from a compression standpoint, but it's smart from an intellectual property standpoint since B-frames are apparently patented pretty tightly. Unfortunately, the patent question likely won't be settled any time soon, but I'm cautiously optimistic that VP8 will turn out okay.

Finally, as Dark Shikari mentioned in his assessment of VP8, perhaps the most serious issue facing WebM (at least in my opinion) is that the finalized VP8 spec is based on buggy C code. For reference, specifications usually describe algorithms and behaviors, then programmers create code to achieve the desired behavior. Sometimes, people who are creating a spec that is not intended to be widely read/followed (e.g., a private company creating a closed-source codec/spec [nudge, nudge]) will, rather than describing the desired behavior, copy code from their reference encoder/decoder that performs the desired function. The reason this is a problem is that, if this code contains bugs (and some of it does in the case of VP8), all decoders that want to properly follow the spec *must* include these bugs or else not conform to the spec. Dark Shikari rightly compared it to the way Internet Explorer 6's flawed execution of HTML required Web developers to write bad code that conformed to those flaws.

Now, maybe Google will create an updated spec (WebM+ or 2.0 or Electric Boogaloo or whatever) that will fix all of the bugs and stand up to x264 high profile in quality, and maybe VP8 is similar enough to VP3 that some of the striking improvements from the Theora project can be applied to VP8. Until then, WebM will be good enough for the Web, I think, and hopefully will provide a modern, free-as-in-speech codec that everyone can get behind. I'll still be using x264 for my own encoding, but it's nice to see improvements in truly free video codecs.

Have an opinion on the subject? Leave me a comment and let me hear about it.

Analytics Tracking Footer