Showing posts with label street fighter. Show all posts

Monday, October 14, 2019

Adding Genesis/MD to MC-Cthulhu

So, about a year ago I had been working on a plan for a universal arcade stick with support for a bunch of retro consoles plus PC and PS3 (via an MC-Cthulhu board), Sega Genesis / Mega Drive via a padhacked 6-button pad from eBay and Xbox 360 via a leftover control board from one of my Mad Catz sticks.

360 and Cthulhu were supposed to share the same USB-over-RJ45 with a toggle switch to go between them and Genesis/MD was going to have a little pigtail that could hook up to an extension cable when needed. When I got the 360 board wired into the Cthulhu, though, everything went haywire with phantom button presses and all sorts of nonsense. This got me pretty bummed out about the whole project and I put it on ice.

However, there's been a lot of interest over on my MC-Cthulhu pinout page from people trying to integrate Genesis/MD input with the Cthulhu board since then, so I figured I'd better at least finish up that part and report my experience, which I finally did last night.

I won't go into a ton of detail in this post, as the "how" bits have already been covered in my other posts (linked above), so instead I'll focus on what worked and what didn't.

First off, I had originally tried swapping between the Cthulhu and the 360 board (before I abandoned it) using a momentary DPDT switch like you find on a guitar foot pedal. I wanted something tough that was hard to press, so it wouldn't trigger accidentally mid-game. This ended up being the wrong tool for the job, though, as it only switched to the other board while the switch was actually held down. So, I switched over to an ON/ON DPDT 2-position switch. I'm pretty confident this would have worked as intended had my 360 board wanted to cooperate.

The way the switch is supposed to work is: from your USB, you have 4 lines--GND, 5v, Data+ and Data-. The 5v and GND are wired onto the extra solder points on the Cthulhu (that is, the 3 sets of thru-holes where you solder on the RJ45 lines) and the Data+/- lines are wired onto the switch, with 2 coming from the Cthulhu and 2 coming the 360 board's USB header. The output lines from the switch (typically the 2 center leads) connect to the RJ45 lines. In normal use, both boards will be powered (whenever you do a multi-board solution, all boards need their voltage and ground lines connected together at all times) but the one that actually sends/receives data will be controlled by the toggle switch.

Once I got the boards wired together and noticed the strange behavior, I did a lot of troubleshooting and determined that just having the 5v and GND lines linked up was enough to break everything, so that was that. I may revisit it another time with a different 360 board, but for now I decided to just drop 360 support altogether. With the 360 board out of the picture, I didn't need the switch anymore, but I just left it on there anyway rather than having a gaping hole in the side of my stick for dust and liquids to sneak in. Plus, now I have a little fidget thingie I can fiddle with between matches.

sorry for blurry pic :(

Moving on to the Genesis/MD pad, there wasn't really anything unexpected. I soldered the padhack's button lines to the secondary soldering points on the Cthulhu (the 2 rows of thru-holes labeled A-H and 1-9) as outlined at the end of my pinout post and it all works great. The crummy pad I used has a very short cable, which made it super-easy to cram into my already-crowded Mad Catz SE chassis.
Yes, the wiring is a mess. Good thing nobody ever sees it but me (and now you)
You'll notice I did a little loop around a screw post before sending the connector out the back side. That's to prevent the wire from tugging on the pad PCB and ripping out my solder joints. I also covered the entire PCB and solder points with electrical tape to prevent any stray grounding/bridging.
The pigtail. It's pretty unobtrusive without the extension cable attached
You might also notice that I removed the 360 home/LED/turbo panel with a 3D-printed blank, which just barely fits a 24 mm button to serve as the Cthulhu's HOME button.

While I was at it, I took a tip from u/gongfuren on reddit's r/fightsticks board and swapped out some plungers on my short-stem IL competition buttons for a cool "bullseye" look and also removed the springs from the buttons, which gives them a much lighter touch. They're still a lot stiffer than Sanwa buttons (which is good, IMO, as I like to rest my hands on the buttons) but they feel significantly more responsive than with the spring, and they still keep their satisfying cherry click.

Here's the final result:
And here's my other IL stick that I swapped plungers with:

Tuesday, August 22, 2017

8bitdo NES30 Arcade Stick Review and Modding Info

I like to play retro games from my couch and I prefer using an arcade stick, but I don't want to have a giant cord stretching across my living room as a tripping hazard. The obvious solution is to get a Bluetooth arcade stick. The only problem: nobody makes them. It seems the people driving the arcade stick market are distrustful of wireless communication due to latency concerns, despite data from a very reputable source suggesting otherwise.

8bitdo had put out a couple of arcade sticks in the past, the FC30 and FC30 Sanwa Edition, but those sticks never got much traction, AFAICT, and they're long-since discontinued now (and I've never seen one come up on eBay). They've revisited the concept recently, though (presumably because their devices are compatible with the Nintendo Switch*, which got a Street Fighter 2 port, and no other company has released an arcade stick for that market), and released their NES30 Arcade stick, which I preordered as soon as I heard about it.

First impressions - Build Quality and Information

The plastic used for the main body of the box feels a little flimsy. It has some flex to it, which isn't encouraging, and there's a lot of empty space inside the stick, though this is actually a good thing when it comes time to start poking around in there. It has a nice, thick, solid metal base with recessed screws and built-in rubber feet, which is a big advantage in my opinion when compared with the flimsy, easily lost rubber feet from the Mad Catz TE and SE sticks (and once the feet were lost, the non-recessed screws would scrape up wooden surfaces and get caught on fabric -_-).

The buttons are knockoff Japanese-style and feel predictably crummy, but passable if you're just going to use it casually. The stick feels pretty decent, really, with none of the gravelly, scraping feelings characteristic of the Mad Catz SE sticks as they slowly ate themselves.

There are 8 full-size (i.e. 30 mm) buttons for A, B, X, Y, R1, L1, R2 and L2 in modern, staggered arcade stick layout, and a smaller button (presumably 24 mm) for Start. There are also smaller non-arcade-style buttons on the control panel for Select, Pair and Turbo. While Select is bindable in gaming software, the Turbo and Pair buttons are not exposed, leaving users with 10 buttons and a 4-way joystick. That is, there is no dedicated "home" button for assigning to "menu_toggle" in RetroArch/MAME.

Wireless connectivity over Bluetooth is quick and painless, and there's no obvious perceptible latency. If you want to play wired and/or charge the stick, 8bitdo has supplied a full-size USB-A-to-A cable, which is, frankly, bizarre. 

Modding

The metal base is held onto the box by 6 small phillips-head screws. Once those are removed, you can pop the base off safely. That is, there is nothing attached to the base that can get yanked out, etc. Once inside, you can see that the wiring is clean and organized, with color-coded wires leading to plastic pin-headers on the board. You can also see the support structure (the hollow tubes surrounding the buttons), which provides a strong backbone where the stick will be seeing the most abuse.
A shot of the insides before I got started on it.
The good news: swapping out the buttons on this stick is a breeze. The stock buttons snap right out and the .110 quick-disconnects transfer over to Sanwa buttons, which are a perfect fit (I swapped in Sanwa 30 mm OBSFS buttons), with no trouble. The stick also has mounting screws that line up perfectly with a Sanwa JLF stick.

The bad news: THIS IS NOT A COMMON-GROUND PCB. That's not a big deal with the buttons (unless you just really like to daisy-chain grounds for tidiness), but it's a very big problem for the stick, since Sanwa and Seimitsu sticks use a common-ground PCB for their switches. In short, this stick is INCOMPATIBLE with Japanese-style sticks without doing some significant modification. Correction: I was totally wrong about this. It is indeed common-ground, and you can just twist up all of the grounds (looking down on the inside of the stick, it's all of the top wires from each signal+ground pair) and attach them to your stick's common ground pin. Dunno what I was doing wrong when I first tried it, but I just now wired up a Seimitsu LS-56 with no issues. So, false alarm.


Speaking of the stick, it has a clip-in square restrictor plate/gate and has the control wires soldered directly to Lema microswitches, from Chinese company Zhejiang Lema Electrics Co. Ltd:
Since they were directly soldered, I needed to cut the wires, making this the first destructive modification so far.

The Lema switches are pretty close in size and shape to the tough-as-nails Cherry microswitches you would find in Happ/IL sticks and buttons, and I decided to swap them out for some I had in an old Happ Competition joystick.
The result is satisfyingly clicky and extremely light (that is, there's barely enough resistance to bring the stick back to center; some people will despise this). I was able to pull off 360/720-degree motions easily and reliably, but I'm not 100% convinced that I want to stick with this setup permanently, so I used insulated alligator clips rather than soldering .187 quick-disconnects to the wires in case I decide to swap it out with other switches in the future.
The extra-roomy case came in handy here for holding my insulated alligator clips
The restrictor plate/gate is held in by 4 little screws and 4 clips. Once the screws are out, the clips are nice and easy to manipulate, unlike the ones on JLF sticks, which are notoriously difficult to work with. I didn't check to see whether Sanwa plates would snap in, but it looks pretty likely. I might swap in an octo-gate at some point and will update this post if I run into any issues. [Update 10/27/2017: by request, I swapped in the Sanwa octo-gate from one of my other sticks and it fit just fine. The Sanwa plate is thicker than the stock plate, so I really had to cram it to get the clips to snap into place, but otherwise, it's no problem.] Here you can see the Cherry microswitches fit in nice and snug under the stock plate:
I didn't get around to testing it, but I suspect the longer, screw-down Happ/IL American-style buttons would fit just fine in the case, since it seems to be a little taller than the Mad Catz SE boxes, which were only about a quarter of an inch too short to fit them comfortably. [Update 10/27/2017: I was wrong, they're almost exactly the same height as the SE box, so the long-stem Happ/IL buttons won't fit, but the short-stem ILs will.]

*Note, the wired vs wireless issue seems to actually be in favor of wireless on the Switch, oddly enough: https://www.youtube.com/watch?v=avvmck40cIw

Monday, November 3, 2014

Hooking a PC to my Arcade Cabinet

As I mentioned at the end of my previous post, I traded my Super Punch Out!! cabinet for a generic Dynamo cab that I intend to drop a Street Fighter II Turbo: Hyper Fighting board into at some point. In the meantime, I decided to hook up a PC for use with emulators, specifically MAME via the RetroArch frontend.

As with my TVs and Retro Gaming post, this subject ended up being more complex than I anticipated, and the information available online is incomplete and often takes place on forums with poorly hosted pics, etc. So, I thought I'd share my experience here in the hope that others can avoid any potentially costly mistakes.

First off, it's important to realize what an arcade cabinet really is: a low-res tube television in a giant wooden box with some lights and speakers, not unlike one of those old console TVs. The major difference is that arcade monitors use an RGB connection, which--as stated in my TVs and Retro Gaming post--is the cream of the crop for video quality. That stated, if you don't already own a cabinet and you live in PAL land, you could build yourself a big wooden box and drop a SCART-capable CRT into it and have much the same results with a VGA-to-SCART adapter. To do the same thing in NTSC regions, you would need a TV with "component" (aka YPbPr) video inputs and a VGA-to-component adapter. If you decide to go this route, you'll be able to achieve a pixel-perfect arcade picture on your boxed TV using emulation, but you won't be able to connect actual arcade boards. You'll also need to take care that your PC is outputting a 15 khz horizontal sync rate video signal, which can be difficult to achieve with standard PC components (more on this later).

I wanted to be able to connect actual boards, so I went with an actual arcade cabinet, which adheres to the JAMMA video and connector standards. If you decide to go down this path, I strongly recommend going JAMMA-compatible, rather than using some funky custom cabinet (e.g., a Punch Out!! / Play Choice 10 cabinet...), as it will make switching among boards--and your PC--much easier. That was the entire purpose of the JAMMA standards, after all.

The JAMMA connector standard supports 2 players, each with an 8-way joystick (i.e., 4 switches per) and 4 buttons each (a start button and 3 action buttons for each). This is plenty of inputs for most games, but not for the 6-button fighting games that became popular toward the end of the arcade era. The JAMMA standard was extended to accommodate these additional inputs--sometimes known as JAMMA+--but this limitation to the original standard is important to keep in mind.

So, assuming you have a JAMMA/+-compatible cabinet and monitor, you have some other decisions to make. For controls, you have a number of options, including: 1.) dropping in the guts of a pair of USB joysticks, like the Mad Catz TE/SE arcade sticks, which are well-supported on PC, 2.) use the guts of a pre-made PC-to-arcade control panel, like those from X-Arcade, 3.) use a purpose-built control interface board, like Toodles' Cthulhu board or Ultimarc's I-PAC2/4 boards, or 4.) piggyback off the existing control panel connection to your cabinet's JAMMA connector via Ultimarc's J-PAC interface, which is what I chose:

The J-PAC allows you to keep the same controls whether you're on PC or actual arcade board, so you're not having to mess with a bunch of quick-disconnects every time you want to switch between the two. Moreover, the J-PAC is designed to block out incompatible video signals via the red jumpers. On a standard CGA arcade monitor, you'll want to leave only the bottom, 15 khz jumper and remove the other one, which comes defaulting to 31 khz (i.e., VGA standard, and potentially dangerous for some arcade monitors).

While the J-PAC is an excellent piece of kit, they have made a few design decisions that are...strange, to say the least, and you should be aware of them ahead of time. First, and possibly most importantly, J-PAC boards no longer come with a micro-USB port, but it seems none of the marketing shots on the websites of Ultimarc or resellers reflects this. Instead, all you get is some empty solder pads where the port should be:
Instead, they run the USB signal through the left-hand PS/2 port, so you can either connect the board to your PC using a PS/2 Male-to-Male cable, which I certainly don't have on-hand, or use a PS/2-to-USB adapter like this one (note: only "dumb," i.e., non-active, adapters will work):
in conjunction with a USB-A-male-to-USB-A-male cable, which is extremely uncommon and, again, I certainly did not have one on-hand. So, since I had to order something anyway, I went with a PS/2 Male-to-Male cable, since PS/2 is a stream protocol and doesn't have the limitation of USB polling rates.

The other strange choice is on the VGA port. Instead of attaching a VGA female port, as you might expect from monitors and so forth, they have attached a VGA male port, which means you can't use a normal VGA cable and must instead use a VGA extension cable (i.e., with one male end and one female end). This choice is made stranger still by pairing the male VGA port with *female* thumbscrew ports, which means you can't attach a normal extension cable without first removing the thumbscrew ports, which is the only thing holding the VGA port's faceplate to the board! After digging around in your cabinet for your lost faceplate, you can flip the thumbscrew ports around and screw the male ends into your VGA extension cable's female thumbscrew ports, but the on-board port gets in the way of the screws turning and basically makes it a big pain in the ass.

Andy, if you read this: please switch to a female VGA port, or at least fix the thumbscrew/faceplate issue. It's quite frustrating.

Anyway, once that's all done, you'll also need to attach your additional buttons--that is, the 3 kick buttons for each player--to the handy screw terminals on the left-hand side of the J-PAC. Ultimarc has given us 5 additional inputs per player (conveniently labeled 1SW4, 1SW5, etc.), as well as unpowered speaker ports (powered speaker ports would have been nice, of course, but it's a limitation of the JAMMA connector's power draw, apparently) and a couple of grounds. I was pleased to find that I didn't need to actually hook anything up to the provided grounds, as the existing common-ground that was already daisy-chained across my control panel buttons worked just fine. This will reduce the amount of fiddling with disconnects necessary when switching to an actual arcade board from the J-PAC.

As a result of the unpowered speaker ports, you'll need to either cannibalize the amplifier out of some cheap computer speakers and attach your cabinet's speakers to it, or else simply drop some computer speakers, amplifier and all, into your cabinet and call it a day, which is what I decided to do. It doesn't sound awesome, but it's passable.

You'll also have to decide how and where to house your PC components within the cabinet. Arcade cabinets have a substantial amount of empty space inside of them, particularly down around the coin door, but none of it is really easily accessible unless you can remove the entire back of your cabinet. On mine, the back does not remove easily,  other than a small access hatch for servicing the monitor, so I stuck my PC components in there, below the monitor cage, beside the cabinet's own power supply:
As you can see, I also rigged up an extra arcade pushbutton I had lying around to serve as the PC power switch.

Speaking of the cabinet's power supply, Ultimarc's own J-PAC installation instructions recommend completely disconnecting your cabinet's power supply from the JAMMA connector and only leaving it connected to the monitor. This is good advice for very old cabinets/power supplies, which can burn out over time if they don't see a load in the proper places. It was also good advice in case you plugged your J-PAC into the JAMMA connector upside-down, but this evidently isn't a problem anymore due to changes in the circuitry. I've also screenshotted Andy's post about it in case that link dies at some point:
Once you have everything installed and situated, you can power on your cabinet and PC and see how it treats you. As long as your J-PAC only has the 15 khz jumper attached, you can rest assured that your precious monitor will be safe, though it's likely you won't get a picture at this point due to incompatible sync in the signal. Instead, you'll just get a crazy image that looks kinda like trying to watch the scrambled premium channels on old analog cable TV.

If you're absolutely certain you can make the correct, non-damaging signal, you can skip the J-PAC and use a "dumb" VGA-to-arcade-RGB adapter like this one:
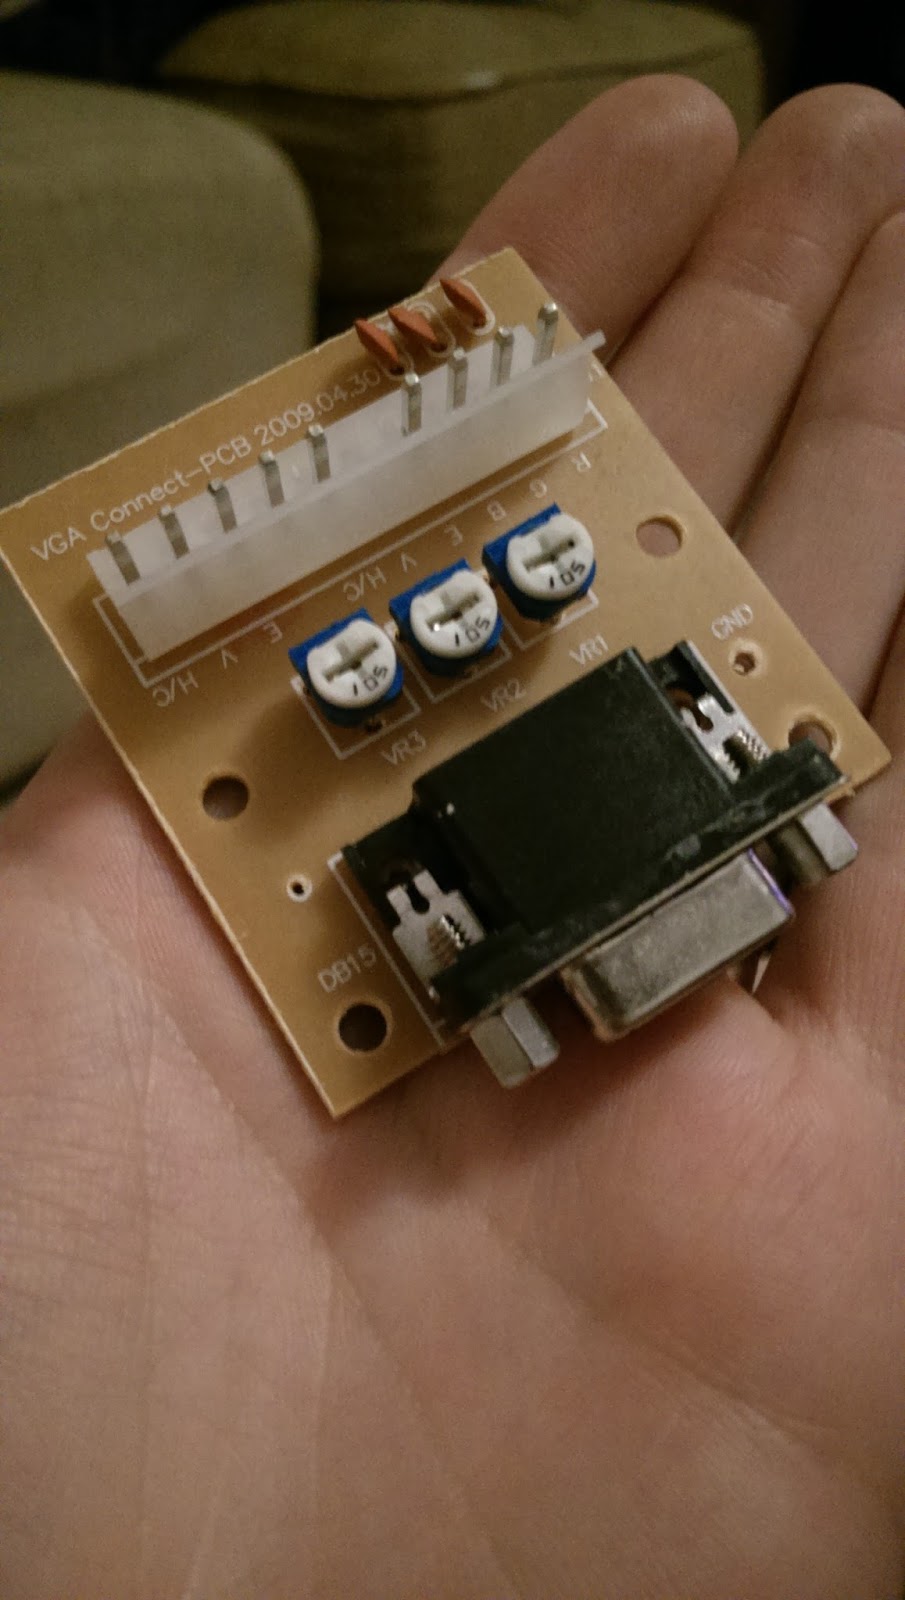
Either way, to get an image to show up, you'll need to use a compatible resolution and sync. On Windows this is achieved through a piece of software known as Soft15khz. In Linux, you can make it happen with the xrandr utility or by adding a custom modeline to your xorg.conf file (which probably doesn't even exist anymore; you'll have to create one from scratch, which is a bit of a hassle). You can also use a custom EDID, which is nice because it works with KMS consoles, but you'll have to recompile your kernel, nvm, you can specify custom EDIDs from GRUB (see this post for details). I went with the xrandr method, and I used a custom resolution of 1920x240. This aspect ratio may seem crazy, but CRTs don't really care what kind of horizontal resolution you feed them, so you can use a super-wide resolution like this and it will make fractional (i.e., non-integer) horizontal resolutions all look fine. 1920 also happens to be exactly 5x the 384 horizontal resolution of CPS-1/2, so Street Fighter games will be perfect. The JAMMA video standard calls for negative composite sync, so any custom modelines you create using modeline calculators (like this one) will need to end with "-HSync -VSync" in order for your monitor to sync up properly.

Once you finally get a picture, it should look something like this:
And that's pretty much it. I purchased an old marquee from eBay for $25 (it has some scratches, but it matches the cabinet's condition, so all the better) and printed out the bezel artwork from some high-res scans I found online. You can buy professionally printed repros for the bezel art, marquees and control panel overlays (CPOs), but they tend to cost as much as old stock for something as relatively new and common as Street Fighter games.

It's also worth noting that it's illegal to actually charge money to play games on a MAME machine, and you have to pay some taxes and be licensed to even accept quarters for any arcade game, so you'll need to hook up an extra button that goes to the coin mech to give yourself credits.

I have some additional woes with my monitor (including a failing flyback transformer, which causes the screen to get blurry, overbright and show horizontal retrace lines toward the top of the screen), which I will cover in another post, as they don't really relate to the subject at hand.

Update (9/15/2015): here are some shots of my repaired monitor playing some games at native res in RetroArch:

Analytics Tracking Footer