Sunday, December 6, 2020

Improving shuffle/random playback - Plex

Whenever people discuss random playback of multimedia files online, I always see this same anecdote pop up: Apple wanted to add shuffle to iTunes, so an engineer made a perfectly random algorithm to serve up perfectly random tunes. Some time passes and users start to complain because the algorithm seems to have an affinity for certain songs that are played over and over while others languish, played only infrequently or even never. As the story goes, the algorithm is, of course, perfect, and the silly humans merely perceive patterns where none exist, like superstitious cavemen, and the ratio of plays would have tended toward 1.0 if they had just waited long enough and with a large enough sample size. So, our fabled engineer goes back to his perfectly random algorithm and makes it less random, but in a way that appeases the poor dumb-dumbs, and that's how we get iTunes' shuffle.

If you couldn't already tell, I think this anecdote is horseshit on several levels. Anyone that works with computers knows that producing true randomness is very hard to do (an entire branch of cryptology is devoted to this), and patterns in pseudo-random distributions tend to become more apparent with more samples, not less. Personally, I used iTunes' shuffle exclusively on a set of several thousand songs over the course of a few years, and it most definitely picked winners and losers, so Mr. Smug Engineer can get stuffed.

Nevertheless, the fact remains that if you randomly sample from a set (whether it's really random or pseudo-random), you're going to get repeats, and that's a drag when you feel like you're hearing the same songs (or watching the same rerun of your favorite show(s)) over and over. The solution to this problem is to use any ol' pseudo-random shuffle but ensure that each item is removed from the list of available items once it has been played until every item has been played. Rinse and repeat.

Plex has a way to do this, but it's not obvious, and it builds from their "smart playlist" feature. With this in mind, you would think 'step 1' would be to head over to the 'Playlists' page, but this is unintuitively not the case. No, you have to go to main page for the type of file you're wanting to randomize (in my case, TV shows):


and, if there are any tabs for "recommended", "library" and/or "playlists," again do the unintuitive thing and *do not* go to the "playlists" tab. Instead, go all the way to the left, where it says "All", click on it, and at the bottom of the menu that pops up, look for "custom filter...":

Here, you can use search terms and keywords to filter down to the criteria you need. For example, "show title" "contains" "Futurama":


Now, here's the important bit: click on the plus sign (+) in the circle on the far right, past your search field to add a new set of criteria. From here, instead of "show title", look for "unplayed episodes" and set the next field to "is true". Click on "save as" to give your playlist a title, and it will now appear in your playlists tab, with a little gear in the corner to denote that it's a dynamic "smart" playlist:

Now, when you go to play from the playlist, use the shuffle option and it will shuffle among the remaining unplayed episodes *only*. Eventually, you will exhaust the playlist and need to go back to the show and mark it as "unplayed" to refresh the pool of episodes.

Sunday, November 29, 2020

Handy FFmpeg + bash scripts

I created these scripts to perform some common tasks with FFmpeg and figured I'd post them here in case anyone else needs to do the same jobs.

Convert to mp3

I keep my music collection in lossless FLAC format, but not everything supports this format, including the stereo in my car. It'll play music files from a USB thumb drive and is compatible with a variety of lossy formats, just not FLAC, so if I want to put a new album on my drive to get it into my regular rotation, I have to convert from my lossless archival copy to a compatible lossy format. I made this basic script to simplify the process:

#!/bin/bash

if [ "$1" == "" ] || [ "$1" == "--help" ]; then
echo "Convert audio files to mp3 using LAME with high-quality VB0 settings."
echo "Single files or wildcards are valid arguments."
exit
fi

for i in "$@"
do

[ ! -d "mp3s" ] && mkdir "mp3s"

name=`echo "$i" | sed 's/\.[^.]*$//' | sed 's/.*\///'`

ffmpeg -i "$i" -acodec libmp3lame -q:a 0 mp3s/"$name".mp3

done
To explain a bit what's going on: the first 'if' statement echos out a helper statement if the script is run either without an argument or with the standard '--help' switch. You'll notice I use the special built-in "$1", which means "first argument". More info on the built-in argument variables here. It also exits here instead of going on to the rest of the script, which wouldn't really make sense without the proper arguments anyway.

Next, we start the 'for' loop. Here, I've used another built-in alias, "$@", which is important because it will allow the loop to expand to accept wildcards, such as asterisk/*. When I was first working on this script, I used the same "$1" as before and it would only hit the first match from the wildcard and then stop. More info on that problem in this stackexchange post.

So, for each match to the pattern (be it a single file or a series), it will first check whether the directory named 'mp3s' exists and, if not, it will make it (I find it's easier to deal with the files if they're all in one place instead of mixed in with the FLACs that have exactly the same name other than file extension...).

Next, we declare a variable, "name", which uses some sed magic to remove the file extension. Unfortunately, I looked this up a long time ago and no longer have a link to where I found the answer, and sed syntax is pure black magic to me, so I have zero clue what it's actually doing, but it works. The reason we need to do this is because the resulting mp3s would all be named foo.flac.mp3 otherwise, which is ugly.

Alright, the last bit is where we use FFmpeg to actually do the work of reencoding. The only real gotcha here is knowing that the LAME encoder is called libmp3lame, and knowing about the qscale:a setting, which determines the variable quality/bitrate. Since my car supports it, I use VB0, which is variable bitrate that goes up to 320 kbps when necessary but doesn't waste bits encoding silence, for example. If your device doesn't support variable-bitrate mp3s, you can do -b:a 128k (or whatever bitrate you want) instead.

Trim From The End

Turns out it's really hard to get FFmpeg to trim an arbitrary number of seconds from the end of a file without reencoding, which is exactly what I needed to do to remove a very loud and very useless sequence at the end of every episode of my Duckman DVD rips (my wife likes to fall asleep to reruns, and this sequence would startle her awake every time).

#!/bin/bash

if [ "$1" == "--help" ] || [ "$1" == "" ]; then
echo "Enter a video's filename followed by the number of seconds to trim from it."
echo "For example (to trim 25 seconds from a video named 'foo.mp4'):"
echo "foo.mp4 25"
echo "The trimmed file will be placed in the newly created 'trunc' directory."
exit
fi

DURATION=`ffprobe -v 0 -show_entries format=duration -of compact=p=0:nk=1 "$1"`

echo "$DURATION"

if [ "$2" == "" ]; then
echo "Your video is '$DURATION' seconds long. You need to specify how many seconds to trim."
exit
fi

echo "Total duration is: '$DURATION'"
DUR_INT=`awk 'BEGIN { print int('$DURATION'+0.5) }'`
TRIM=`expr "$DUR_INT" - "$2"`
echo "Duration after trimming is: $TRIM"

if [ ! -d trunc ]; then
  mkdir trunc;
fi

ffmpeg -i "$1" -c copy -t "$TRIM" trunc/"$1"
echo "Success"
exit

Again, I started out with some helpful explanation, just in case I forget how to use the script.

Since we're using two arguments, we use the built-in "$1" and "$2". This command will not run with wildcards.

Next up, we'll use ffprobe (a utility that comes with FFmpeg) to determine the duration of the file in seconds. This gives us a floating point value, which means it usually includes a bunch of fractional stuff after the decimal point. This becomes important later. We'll store this value in the DURATION variable.

So, we now know how long our video is, and we know how many seconds we want to trim, so we should be able to subtract the trim amount from the total value using bash's built-in expr arithmetic, but life is never that easy. No, expr won't subtract an integer from a float, so we need to convert the DURATION float value to an integer using some awk magic (I know as little about awk as sed, sadly). This will take our float value, add 0.5 to it, "floor" it (that is, round it down) to the nearest integer and then cast the value to an "int" (i.e., store it as an actual integer rather than a float; like "2" instead of "2.0"). We'll store that int value in DUR_INT.

Now we can subtract our seconds from the total, and we'll store the resulting total value as TRIM.

After that, it's just like before, where we check for (and if necessary, create) our storage directory (even more important this time because we don't want to accidentally overwrite our original files with the trimmed version), then loop through our pattern matches and use FFmpeg's "-t" switch to stop the new file at our newly calculated "trimmed" duration, which will cut off the end (and we're using the -c copy switch to avoid reencoding, which takes a long time and reduces the quality of the video each time).

Saturday, October 3, 2020

Building a Cheapo Hitbox-style Stickless Arcade Stick

I've been playing Street Fighter games for nearly 30 yrs (at the time of this writing), so you'd think even complex maneuvers would be long since committed to muscle memory. Instead, I frequently biff even basic moves and I find my piss-poor execution to be a significant impediment to my proficiency.

So, I decided to try out a "Hitbox"-style interface. Also known as a "stickless arcade stick", among other snappy names (for brevity, I'm just going to call them the generic "hitbox"), it's basically just a normal arcade control panel but instead of using the familiar joystick for directional inputs, it uses 4 buttons, one for each cardinal direction. These interfaces became popular a few years ago, as they make certain types of tricky inputs (for example, advanced movement tricks from many games, including "instant air-dashing", so-called "Korean backdashing" and more) essentially trivial to perform. As a Zangief-main, I was intrigued by the possibilities for consistent SPDs, as well as the opportunity to break a lot of bad joystick-handling habits I've developed over the years.

My first hitbox was just thrown together using a spare control panel I was experimenting with and some extra 30mm Sanwa OBSF buttons I had lying around. It works well enough, but most hitbox practitioners prefer using all 24mm buttons with one 30mm button in the middle as the 'jump' button that can be pressed with either thumb. These buttons are usually about $4+ per, and they're usually paired with a Brook Universal control board, and some people will also add an LED controller board, bringing the grand total to somewhere between $150 and $300.

I didn't feel like paying that much and decided to go cheap while I'm still learning, since I may give up on it at some point anyway (that is, I think it definitely helps with my execution, but at the cost of playing intuitively; it's just feels less natural, spontaneous and fun so far).

I went with a board from the "zero delay" family (since proven to be a misnomer; they add up to about a frame of latency in some cases) by SJ@JX that includes dedicated LED power lines and pre-wired .110 quick-disconnects for just under $20 and some cheap 24mm buttons with integrated LEDs that come in 5 colors (fun!).

Buttons first: similar to the expensive buttons from Gamerfinger, the EG Starts buttons have a mechanical keyboard switch, but this time with an Alps-style switch rather than Cherry-style. Contrary to comments on Amazon, they are not clicky and are instead linear and non-tactile. The comments are correct, though, that they have a much longer travel than Sanwa 24mm buttons, the actuation weight is heavier and the actuation point seems a bit farther down (I don't consider this a bad thing, necessarily, as Sanwas are annoyingly sensitive, in my opinion).

 
The integrated LEDs are not simply white LEDs that are tinted by the colored plastic housing as I had suspected. Instead they shine brightly in the actual color. The only thing to be aware of with them is that the LED +/- posts are connected directly to the 2 large solder pads (visible just above the switch in the image) and can easily be jarred loose by too much force. If this happens, there's not a whole lot that can be done about it, as far as I can tell, because when I tried to reflow the solder, it just sucked up off the pad entirely and wouldn't stick back down to the board, no matter how much flux I used. So just be careful and use a light touch.

Now for the board: it comes with a bunch of pre-terminated molex jumpers with Asian-style button-compatible .110 quick disconnects, though there's another model available for the same price that comes with .187 quick-disconnects for use with American-style buttons/switches. It has 3 different modes of operation: the default PC/PS3 mode, an "Android" mode and an xinput/"360 PC" mode (it specifically does not work with Xbox 360). Only the first mode would map in RetroArch, so that's what I stuck with.

The board comes with some sort of SOCD (simultaneous opposing cardinal directions) cleaning, but I get the feeling it may be inadvertent, as it doesn't really make any sense. Left+right=left and up+down=down. So, you could still do a few SOCD shenanigans, like instant-return-to-charge sonic booms from the P2 side, but nothing crazy and game-breaking. (for the record, ideal SOCD-cleaning is left+right=neutral and up+down=up, IIRC)

Unfortunately, the jumper/wires it comes with are wired in such a way that it is impossible to make the aforementioned buttons light up when you press them. Instead, they are lit all the time, which is fine if that's what you're going for, but if you want them to light on press, you have to cut the lines and splice the black lines with the yellow and vice versa.

 Once that's done, the wires should be connected like this:


In my case, I wanted all of the buttons to light up, but the board is only designed to light up the non-directional buttons, and if you have a light-up joystick, there's a separate power line and 5-pin Sanwa-style joystick interface that you can connect. It does have additional, separate directional input jumper jacks, but they are 2-pin (i.e., just signal and ground; missing the power pin entirely), while all of the jumper wires they provided have the 3-pin molex, so they won't even fit the directional jumper jack. My solution was to use male-to-female breadboard jumper wires to steal power from unused buttons (L3 and R3 in my case) and run a pair of jumper wires from each directional jack. The pins from my breadboard wires fit nicely into the molex holes. I did have to hot-glue them into place, though, to keep them from just falling out if you look at them funny.

That wasn't the end of my problems, though, unfortunately.

Most hitbox layouts cram the 24mm buttons very closely together, I guess to minimize how far your fingers need to move or something? I dunno. But in any event, the vinyl nuts that come with the threaded EG Starts buttons are much too large for the distance between the buttons, so I had to get creative with how I torqued them down.

After all that, everything seems to be working well. I wouldn't really recommend going this route as a serious thing, but if you just want to have some fun and save some money and don't mind getting your hands dirty, it seems to do the trick:

Update (11/17/2020): after using it for a while, the Zero-Delay board is a real problem. The SOCD cleaning is strange and the variable latency on inputs (testing puts it anywhere between just under a frame to more than 2 frames) causes a lot of inconsistency in execution. So, I switched to an Arduino Pro Micro running the fantastic DaemonBite program, which was a night-and-day difference, even for me (and I'm not a stickler for latency stuff).
 
The boards cost between $5 and $10 depending on how many you buy, so it's still a very low-cost option vs a Brook board. I was also able to pull enough juice for the LEDs from the Arduino's 5v line, so it was just a matter of duping that line out in parallel to the voltage input lines of the existing cables. I used the same breadboard-jumper-to-molex trick as before.

Friday, February 28, 2020

CRT shader masks

There are 3 main types of masks used by CRT displays:
Slot Mask staggered grid

slot masks - also known by the brand name "Cromaclear" and/or "in-line shadow mask". These are probably the mask you're most familiar with, as they were used on most consumer televisions. They are characterized by the familiar staggered grid of red, green and blue phosphors.

Aperture Grille wires
aperture grille  - also known by Sony's brand name "Trinitron", this technology was also manufactured by other companies under slightly different names, such as Mitsubish's DiamondTron and ViewSonic's SonicTron. This mask technology is especially popular among retro-gaming crowds as a result of its brightness and vibrancy.


Shadow Mask Triad
shadow mask - the "triad" form of which is most commonly seen in PC monitors. The nomenclature on slot and shadow masks is apparently interchangeable, for the most part, though in retro-gaming, they're usually disambiguated such that "shadow mask" only refers to the triad type and "slot mask" only refers to the rectangular grid type.

When we attempt to reproduce these masks on modern displays, the simplest solution is to take an image of the phosphor layout, shrink it down and tile it across the image, then combine the game image with the phosphor image in some way (multiplication or screen combine are common). This is a simple and straightforward strategy that works well at very high resolutions, but it can become a real mess at lower resolutions as a result of the physical display's subpixel structure (see the pink and green patterns in CRT-Royale's mask at 1080p).

CRT-Royale's tiled images of phosphor layouts at 1080p


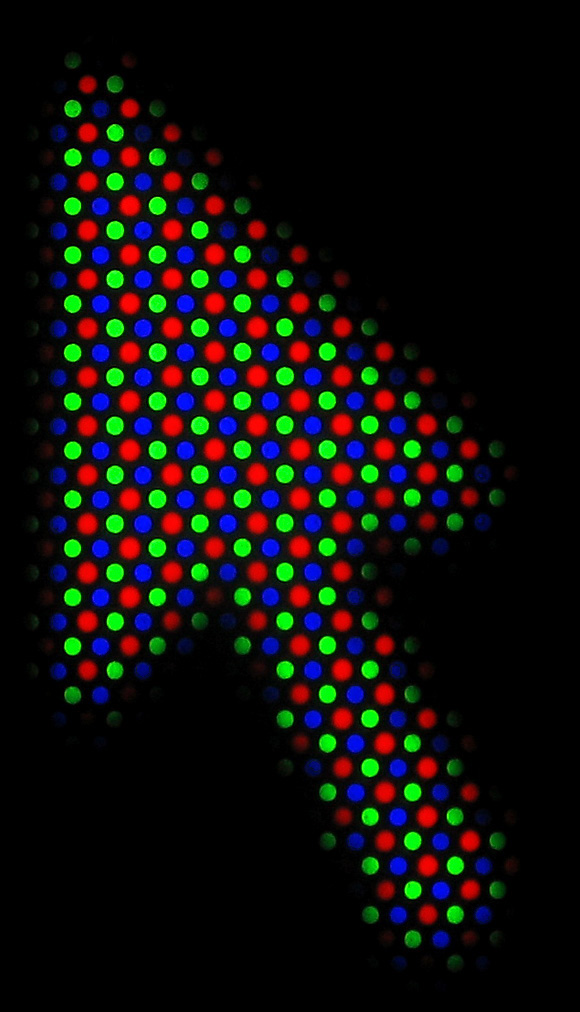
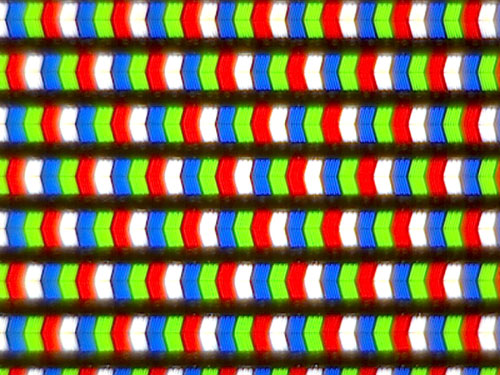
Just like a CRT, LCD monitors display colors by shining light through tiny lenses at various intensities and they combine to form the colors you see. These phosphors are usually much smaller than what you find on a CRT TV, but very fine details can still be distorted by these structures. Very small text is probably the place where we encounter these limitations most often and, back in the late 1990s, companies started trying to improve the situation using subpixel-based rendering techniques under the names ClearType, FreeType, etc. These techniques work with the LCD subpixel structure to give the illusion of higher resolution than the monitor is actually capable of displaying cleanly.

We can use some of these same tricks in our CRT reproduction shaders to produce better mask effects at lower resolutions, without the chromatic aberration caused by averaging together colors at the subpixel level. These patterns rely on the physical pixel structure of the display monitor, so they need to be tiled using gl_FragCoord (or texCoord.st * OutputSize.xy) so the tiling always matches up.

cgwg's crt-geom subpx aperture grille
 The most basic mask that exploits the RGB subpixel structure is a simple alternating green and magenta pattern. When displayed on a normal RGB screen, it makes perfectly evenly spaced lines of red, green and blue, which results in a very passable aperture grille, even at 1080p. This pattern was popularized by cgwg's venerable CRT shader (aka crt-geom).

At 1080p, this looks analogous to a low-TVL Trinitron TV (shader on the left, PVM on the right):
PVM shot from here, perspective-corrected in GIMP
While at 4K, it looks very much like a high-TVL monitor, like a BVM (click to see more details):
 The next simplest pattern is just that same pattern doubled vertically and mirrored horizontally on each successive line, for a green and magenta checkerboard. This results in a pretty decent shadow mask triad pattern that looks pretty legit at 1080p, though it's probably too tight for anything much larger than that. That is, at 4K and higher, it's pretty much invisible unless your nose is right on the screen.


 Here's a detail comparing the subpixel-respecting strategy with a naive tiling approach at 1080p:
 
By extending the pattern and adding in some black pixels, we can get an okay/not great slot mask. As with the previous patterns, the RGB pattern looks good, but since we're limited by the physical pixel size, the black crossbars are unfortunately over-represented, making the image significantly darker than it should be. However, we can compensate for this somewhat just by reducing the strength of the mask effect within the shader.
 At 1080p, the TVL of the simulated display is unrealistically low (like, maybe a really crummy portable TV or something), but at 4K this mask gets more realistic in terms of scale.

At 8K, though, you can start drawing much better, more accurate phoshor patterns while still maintaining a realistically usable TVL, though the tiled patterns start getting pretty weird.

Funky slot mask pattern
The results look good, but it's worth noting that at these resolutions, naive tiling doesn't look too shabby, either, especially with a few feet of distance between the viewer and the monitor.


crt-lottes rotated mask
Another totally different strategy is to flip the phosphor grid 90-degrees to avoid the uneven subpixel spacing altogether. This isn't "accurate" to the way CRT masks actually look, but it sidesteps a lot of the problems caused by trying to reproduce them on modern displays, including problems caused by variations in subpixel layouts (that is, not all LCDs use nice, clean R,G,B arrays; some use RGBW, RGBY or BGR and some, like OLEDs, use a crazy layout that looks totally alien; see here for more: https://geometrian.com/programming/reference/subpixelzoo/index.php). This strategy is used in Timothy Lottes' "FixingPixelArt" shadertoy, on which the crt-lottes shader is based.

Many subpixel-respecting mask patterns can be found in LUT form alongside cgwg's crt-geom-deluxe shader, including some of these and some others I didn't mention (mostly aperture grille variations that work at higher resolutions, like 4K and 8K. You can also find these and others in my subpixel_masks shader snippet, which is designed to be #include-d in other shaders for easy mask-generation and uses an expensive but very informative array-based syntax so the patterns are easier to visualize and understand.

Analytics Tracking Footer