Thursday, April 25, 2013

Multipass Shaders - NTSC, Motion Blur and More

It's been a while since I've done one of these posts and, in that time, RetroArch's multipass shader implementation has matured quite a bit, paving the way for a lot of really cool effects that simply can't be done in a single pass. At the time of this writing, higan's multipass shader implementation hasn't been released yet, but many of these shaders should be portable to it (with some substantial effort, at least) when it arrives.

As always, images were captured at 4x scale. Click the thumbnails to embiggen.

First up:
Themaister's NTSC Shader
Themaister wrote a sweet new real-time NTSC Composite shader that mimics a lot of the noise, fringing and crosstalk present in the NTSC composite signal:
This shader is a big deal because blargg's CPU-based NTSC filter was previously the only way to get this effect, which was important in some older games' art design. However, the filter had to be hardcoded to the individual consoles' specific resolution, which made it a headache to maintain in a multi-console setting. This shader should work on all of RetroArch's cores, and it is available in GLSL and Cg/cgp flavors.

I mixed it with cgwg's CRT shader and ended up with this (ntsc2-crt.shader):
You can compare that with an earlier version I cobbled together from the old NTSC shader--which tended to be finicky and not everyone liked anyway--and cgwg's CRT (crt-geom-interlaced-flat-ntsc.shader):
Digging through an old thread on byuu's forum, I also found where cgwg had written a similar shader that combined NTSC with CRT in 6 passes with barrel distortion (6-pass-ntsc+crt2.shader):
In the same thread, cgwg had posted this shader, called 'beam-dynamic,' that is essentially the same result as the beam4 shader mentioned in one of my other posts:
Out of all of these variations, I think my favorite is Themaister's NTSC with the addition of scanlines that have been softened with gaussian blur (ntsc2-maister-scanlines.shader):

Harlequin's Gameboy Shader
This shader does for Gameboy emulators what cgwg's CRT does for regular consoles, i.e., recreates the look of the original display with startling verisimilitude:
I'm not going to spend a lot of time talking about this shader here, even though it's completely badassed, since it's covered at length in a previous post. It's available in Cg/cgp format only, though you can use Themaister's handy cg-to-glsl python script to convert it to GLSL if necessary.

Harlequin's LCD Shader
Using some of the same concepts from the Gameboy shader, Harlequin is also working on a more generalized shader that mimics the low-resolution, slow-refreshing color LCD displays from a number of handheld consoles, such as Sega's Game Gear and Nintendo's Gameboy Advance:

Similarly, cgwg posted an LCD shader he's been working on that produces a regular, square pixel grid pattern, paired with some simple motion blur (lcd-cgwg.shader):


Motion Blur
Speaking of motion blur, I wrote a multipass version of this shader a while back and cgwg revised it down to a single pass (refers to previous frames, so still incompatible with higan v092 and earlier). This effect can be good for mimicking the slow response time of crummy LCDs (motion blur.shader):
I also made a version that only adds the blur during rewind, along with a little sepia-tone effect, kinda like the rewind effect in Braid (braid rewind.shader):
This shader can be added before pretty much any other shader (either manually by pasting in the code or by using the new, built-in RGUI shader stacking function and/or glslp shader configuration files) at a scale of 1.0 and the effect will only kick in when the game is rewinding :D

GTU
This shader from aliaspider is an interesting take on the CRT paradigm insofar as he didn't want to focus on phosphor emulation or heavy-handed scanlines or any of that other jazz. He was more interested in the blurring/blending effect of CRTs that enabled tricks like pseudo-hires transparency and color dithering. Later revisions include some sweet gamma correction and the ability to create mild scanlines (if you choose; GTUv031-multipass.shader):
I think this is one of the best ways to get pseudo-hires transparency working properly, and the transparency it creates is smooth and absolutely beautiful:
Aliaspider made a single-pass version of the shader that should work in higan v092 and earlier, along with the multipass version linked above for RetroArch, and a multipass version for higan v093's upcoming shader implementation.

My 4k Phosphor Shader
This is another one that I won't spend much time on, since I cover it at length in another post:
This shader currently doesn't look so hot as it's designed to work at around 10x scale (i.e., on a 4k resolution television or other high-DPI display; it gets wrecked by subpixel behavior at current normal scales [read: 1080p]). However, it brings some nice things to the table, such as easily-edited LUTs that can be created/modified in Photoshop/GIMP rather than a text editor and scale-ability to freaky-huge resolutions. I'll attempt to convert this to byuu's higan v093 format at some point, though it may take some time.

Wednesday, April 24, 2013

Customizing Harlequin's Gameboy Cg Pixel Shader

CRT shaders are great, but they're not always appropriate for every console, seeing as handhelds' tiny LCD screens have very different characteristics, which in turn shaped the way the games for those consoles were designed. The original Gameboy handheld had these characteristics in spades, including a slow response time (manifesting as motion blur), very low resolution and a distinctive 2-color palette that ranged from yellow to green. Emulators typically represent this color palette as black and white, which can be jarring for people who spent a lot of time with the system.

Thankfully, a nice fellow named Harlequin has come to the rescue with a really great pixel shader for RetroArch that does for Gameboy displays what cgwg's CRT shader did for those displays. Like cgwg's CRT shader, Harlequin's Gameboy shader reproduces a lot of different aspects of the Gameboy display and presents a number of options to the user that are easy to modify with just a simple text editor (I use/prefer Notepad++ but almost anything will work). Unlike cgwg's, though, the Gameboy shader also uses some lookup textures (LUT) that require no text editing and can be modified using an image editor such as Photoshop or GIMP. Harlequin has included several example LUTs and I'll cover a few in screenshots.

As usual, all shots are at 4x (which is a bit small for Gameboy resolution, but oh well) and you can click the thumbnails to embiggen. All shots were taken via RetroArch with the Gambatte core unless stated otherwise.

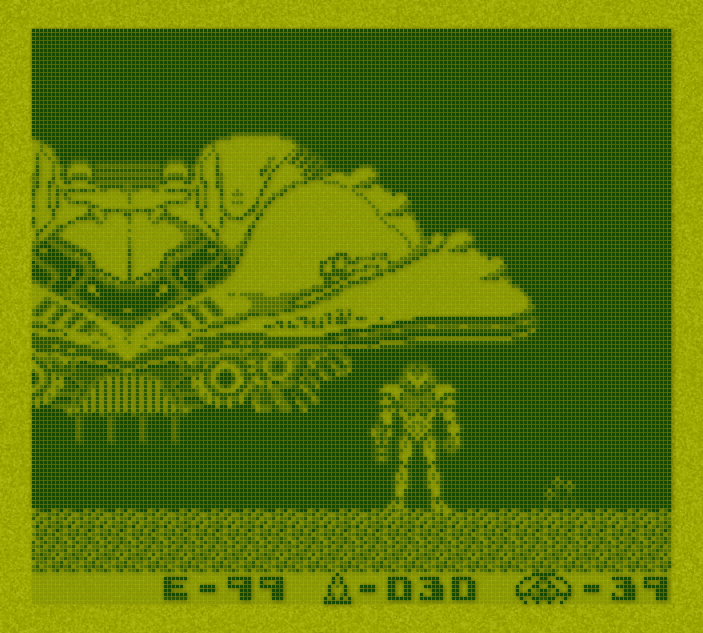
First, here's an unfiltered shot for comparison:
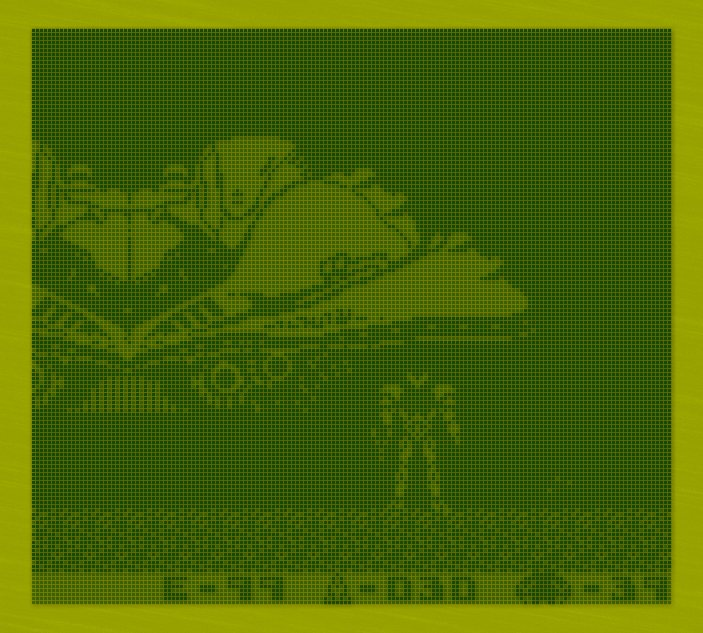
And here's one of Harlequin's Gameboy shader with default parameters:
First, I'll cover the LUTs, which can be edited with an image editor. The palette files are found in the 'resources' folder and they're just two 64x64 squares of color that the shader pulls from to get the appropriate colors (i.e., to replace white and black in the emulator). One of the included samples is yellower and resembles the display in strong light, such as daylight:
Another sample mimics the higher contrast of the Gameboy Pocket revision:
Also in the resources folder, you'll find some sample backgrounds, which apply a texture to the image. The default has some angled hatching, while the included samples show some different types of texture that are possible, like this noisy bit:
Next up, we have the shader variables that are easily modified by users with a simple text editor. These are enumerated in the shader's enclosed README file and I'll include some shots here for reference.

The first one is the 'alpha' setting, which determines how dark a 'white' pixel should be. If you raise the value,  everything becomes darker:
While lowering the value will make the pixel grid less visible in white areas:
The next option, response time, determines how long it takes a pixel to go from white to black and vice versa. It doesn't really translate very well into static screenshots so I didn't bother showing it here. The next option after that, though--blending mode--determines whether just the space between dots is blended (mode 0) or all texels (mode 1), which, in practical terms, is how sharp/blurry the edges of the individual pixels are:
The next option--texel alpha blending--effectively controls how defined the grid pattern is. Higher values result in round/fat-looking pixels:
While lower values give you a sharp, well-defined grid:
After that, we have 'contrast,' which works just like the slider on the side of the Gameboy. Lower values can simulate the look of low batteries:
'Background smoothing' lessens the effect of the background LUT. Higher values make the background less visible, lower values make it more visible:
'Shadow opacity' controls how dark the drop-shadows from the pixels are. Higher values mean darker shadows:
Finally, 'shadow offset' determines which direction the drop-shadows appear (i.e., for simulating a light source that isn't directly above the display). Setting both the X- and Y- values to 2.0 will offset it more:
While setting them both to 0 puts the shadows directly underneath the pixels:
Just so you know: you can use this shader with other RetroArch cores, as well, and see what your favorite games would look like in an alternate, Gameboy-centric universe:

Harlequin has made some major changes to the way the shader looks and works since he first started working on it. While the current iteration is extremely convincing, I also liked an earlier version that looked more stylized. Here's a couple of shots:

You can download it from my Mediafire.

Analytics Tracking Footer