Thursday, July 7, 2011

Sensibeat's Model Swapping Tutorial (Updated)

NOTE: These steps are generally unnecessary now because sloth86's EMGSwap tools have automated the process. However, this tutorial remains a very useful reference and can still be necessary for edge-cases in which sloth86's tools may not work properly. Otherwise, this post will remain for documentation/posterity.

Updated Version:

Swapping objects (SSF4AE)
 I'll swap cammy's first costume hat with the 2nd one.

In sf4explorer I open CMY_02.obj.emo and I "raw dump" (not "extract") the #EMG (cap_lether) (cap_line)

(I name it CMY_02.cap.emg)


I open CMY_01.obj.emo and CMY_02.cap.emg in HxD

In CMY_01.obj.emo I search for the #EMG (F3) containing the "cap"

(note the offset: 670C0)

I go to the next #EMG (F3)


I place the cursor just before that #EMG and I use the "select block" fonction (CTRL+E) using the start offset I noted (670C0):


OK:


(Note the Length: 63F0)

The #EMG selected in CMY_01.obj.emo, I now "Select All" (CTRL+A) CMY_02.cap.emg and I copy it (CTRL+C).


(Note the Length: 50C0)

I paste it (CTRL+V) over the #EMG selected in CMY_01.obj.emo


OK:


Let's do some math in hexadecimal:
Code:
63F0 (Length of former #EMG) - 50C0 (Length of new #EMG) = 1330
1) I need to substract 1330 in the index at the start of the file for every offset of the #EMGs for every object coming after the "cap", as the new object is smaller than the old one.


By opening CMY_01.obj.emo in sf4explorer, I can count that the cap is the 10th #EMG so I have to substract 1330 from the 11th #EMG to the last one (22th #EMG).


The index of the #EMGs starts at offset 28
From there each block of 8 digits is the offset of one #EMGs minus 30 written backwards 2 digits at a time ("little endian"):
01 23 45 69 in little endian will be 69 45 23 01 in big endian

So I'll have to edit the 12 index entries from offset 50 (#EMG 11) to 7F (#EMG 22)
I substract 1330 to the offsets (calculating in hexadecimal and reading offsets in "big endian"):
Code:
00 06 D4 80 - 1330 = 00 06 C1 50  00 06 E4 50 - 1330 = 00 06 D1 20  ...  00 0A F1 60 - 1330 = 00 0A DE 30  
And I rewrite them backwards ("little endian")


2) I need to substract 1330 to 2 more offsets related to the 2nd part of the obj.emo file:

Code:
00 0C A7 00 - 1330 = 00 0C 93 D0  00 0C A5 90 - 1330 = 00 0C 92 60  


Let's go to the 2nd offset (minus 20 written backwards, so 00 0C 92 60 + 20 = 00 0C 92 80), using the goto fonction (CTRL+G):


Here's another index I need to substract 1330 to:


From offset C9280 to C92D7, just before the first readable datas (hand_env):

Code:
00 0C A5 E8 - 1330 = 00 0C 92 B8  ...  00 0C A6 D1 - 1330 = 00 0C 93 A1  


Save and that's it for the 1st part:


Next I'll show how to add dds to the col.emb and nml.emb files and how to link objects in the obj.emo file to the right dds.

1) Adding dds to the col.emb (and nml.emb) files

In sf4explorer, I extract the dds for the cap from CMY_02_01.col.emb
That I name CMY_02_01.dds:


I open CMY_01.col.emb and CMY_02_01.dds in HXD


In CMY_01.col.emb, I add a line of "00" at the end of the index, here:


I change this "04" at offset 0C (former number of dds):


Into "05" (new number of dds):


And I edit the index because I moved all the offsets by 10 with my line of "00":


I add another line of "00" at the end of the file, here:


(Note the starting offset of the new dds will be: 155850)

I "select All" (CTRL+A) CMY_02_01.dds and copy it


(Note the Length: 555F0)

I paste it at the end of the file (after the line of "00"):


Then I go back to the start of the file to enter the starting offset of the new dds minus 40 writen in "little endian"
(40 = offset where I'll write the new index entry)
00 15 58 50 - 40 = 00 15 58 10 ("big endian")
That gives in "little endian":


Now I add the new dds length written in "little endian" (00 05 55 F0):


Save and do the exact same thing with the normal map dds in CMY_01.nml.emb, adding the normal map dds that contains the cap from CMY_02.nml.emb

2) Linking objects in the obj.emo file to the right dds

dds are ordered from 0 and the normal map dds follow the texture dds, so if you add 1 texture dds, every normal map dds will change number.
I have now 5 texture dds from #0 to #4
and 5 normal map dds from #5 to #9

I open CMY_01.obj.emo in HxD and do a search on "#EMG" (F3)
Each #EMG has those kind of data outlined here:


They contain the links to the dds:


The numbers in red are links to the texture dds
The numbers in green are links to the normal map dds

I have to change all the links to the normal map dds for the 22 #EMG according to the new order of the dds
(I just have to add 1 to every normal map link as we added 1 texture dds)


And edit the "cap" #EMG to link it to my 2 new dds #4 and #9:


Save and it's over.


Original Version:

Let's put Ryu's hairs on Akuma's (a.k.a. Gouki).

preparation:

From GKI_02.obj.emo I dump and rename (included in swap obj.rar):
  • GKI_01.bsr

  • GKI_01.nml.emb

  • GKI_01.shd.emo
They'll be used in kensou's sf4tool to repack the file.

From RYU_03.cos.emz I dump the hair emg file that I rename as RYU_03.hair.emg (included in swap obj.rar):


Open GKI_02.obj.emo and RYU_03.hair.emg in HxD:
The hair being the last emg of GKI file, we can get the information on it's beginning and ending from these:


Code:
offset 24 = offset of the list of offsets of names following the last emg:
00 0B A2 70 + 20 = 00 0B A2 90 so the emg finishes at 00 0B A2 8F (1 before)
offset 58 = 1st offset of last emg (hair):  00 0A 68 D0 + 30 = 00 0A 69 00

Let's use the "Select block" option in HxD:


Now select all of the RYU file and copy/paste it over GKY's selection:


OK:

Notice the 2 offsets that will need to be rewritten at the beginning of the file:

Code:
00 0C 01 70  -20 = 00 0C 01 50  -> backwards: 50 01 0C 00 @ offset 24
00 0C 02 20 -> backwards: 20 02 0C 00 @ offset 10

Then the 2 offsets at the beginning of the file:


So it's good for the emo's references.


Now let's take a look at the emg's references:

43 -> former emg is 42
01 -> number of the 2nd texture dds
05 -> number of the 2nd normal map dds

Save and Rename the file as GKI_01.obj.emo

Put it in a new folder with:

  • GKI_01.bsr

  • GKI_01.nml.emb

  • GKI_01.shd.emo
and only those 4 files.

Open kensou's sf4tool and go look for your file path in the upper right, then click the left button under the big window:


Notice the files obj.emo and shd.emo are swapped.
Rewrite them in the right order (obj before shd) and click the right button:


Done.

Rename the newpack.emz into GKI_01.cos.emz and test it ingame with the GKI_01_01.col.emz provided (2nd costume 1st color file edited to be played as 1st costume):


You've got Akuma with Ryu's hairs.

For swapping smaller objects:

Basically you just have to copy/paste your emg and fill the rest of the former emg with 00's. Then there're just the emg number and the dds references to change. So the swap can be done on the .cos.emz directly.

Sensibeat's .emg File Structure Tutorial

From RYU_03.cos.emz I dump the face emg file that I rename as RYU_03.face.emg (included in swap obj.rar):
Notice that the emg is composed of 4 objects sharing 1 name.

.emg file references

Let's take a look at RYU_03.face.emg in HxD:

offset 04 to 07:

Code:
00 01 01 43

number of this emg, former is 00 01 01 42, next is 00 01 01 44

offset 10 to 13:


Code:
00 00 02 C7

appears on every emg, may be the marker to the starting point of every later offset references

offset 14 to 15:

Code:
00 01

number of object's name(s)

offset 1C:

Code:
00 50

no idea what those datas are

offset 20 to 21:

Code:
06 66

number of vertex (666 in hex = 1638 in dec)

offset 2E:

Code:
00 40

appears on every emg, no idea what those data are

offset 24 to 25:

Code:
00 00 39 64 (+ 10 = 39 74)

relative offset (couting from offset 10) of another part of the emg

offset 2A to 2B:

Code:
00 04

number of objects

offset 2C to 2D:

Code:
00 70 (+ 10 = 80)

relative offset (counting from offset 10) of the list of relative offsets of the objects

offset 30 to 5F:

no idea what those datas are

offset 60 to 63:

Code:
00 00 00 54 + 10 = 64

relative offset (counting from offset 10) of the 1st object's name dds references (only one here, more references here in case of more objects)

offset 64 to 7B:

Code:
02 00 00 00 00 02 80 3F 22 00 80 3F 00 00 00 00 00 07 80 3F 22 00 80 3F

dds reference
the 1st number in red points to the texture dds
the 2nd number in red points to the normal map dds

dds are ordered from 0 (first texture dds) and the normal map dds numbers follow the texture ones
Ryu has 5 texture dds numbered from #0 to #4 and 5 normal map dds numbered from #5 to #9
#2 is the 3rd texture dds
#7 is the 3rd normal map dds

offset 80 to 8F:

list of relative offsets (counting from 10) of the objects
00 00 00 80 + 10 = 90     1st object
00 00 20 50 + 10 = 20 60  2nd object
00 00 29 D0 + 10 = 29 E0  3rd object
00 00 38 80 + 10 = 38 90  4th object

offset 3974: (given at offset 24)

offset of the beginning of the second part of the emg, that I have yet to understand...

Sensibeat's cmn.emz File Structure Tutorial

cmn.emz file structure

I extracted ZGF.cmn.emz in piecemontee's SF4 AE and opened it in my hexadecimal editor:
[IMG]
I highlighted the references for each data, in bright colors the Relative Location and in faded color, the Length.
So the 16 characters in red are references for #EMO, the 16 in orange are references for #EMM ... etc

You have to know that those values are read backwards (2 characters at a time)

In the case of #EMO, let's look at it's Relative Location (in bright red), we read: 60 00 00 00
It means the Relative Location is 00 00 00 60 (60)

The Rule is: Relative Location (RL) = offset of True Beginning (TB) - offset of Current Reference Location (CL)

We have RL: 60 and CL: 20
TB = RL+CL = 60+20 = 80 (easy one but for later calculations remember we're in hexadecimal)

The True Beginning of #EMO is at offset: 80
[IMG]

Let's try with #EMM:
We read: E8 8D 02 00
Meaning our RL is: 00 02 8D E8 (28DE8)
We have CL: 28
TB = 28DE8+28 = 28E10

The True Beginning of #EMM is at offset: 28E10
[IMG]


Now let's take a look at our #EMO's Length (in faded red, 1st screen), we read: 88 8D 02 00
It means the length of the file is 00 02 8D 88 (28D88)

The Rule is: Length (L) = offset of True Ending (TE) - offset of True Beginning (TB)

We have L: 28D88 and TB: 80
TE = L+TB = 28D88+80 = 28E08

The True Ending of #EMO is at offest: 28E08
[IMG]

The last references are the True Beginnings of the files names at the end of the cmn.emz file:
[IMG]

For ZGF.skl.emo we can read: 90 D0 A8 00
Meaning its True Beginning is at offset A8D090

Sensibeat's Col-based Transparency Tutorial

So, as many people are asking, and because it may be difficult to find every informations in the SF4 modding thread (31 pages already), I translated a tutorial I made some time ago on a french forum.

I used Sakura as an example.

To make transparency only using col.emz file, 2 steps are required:
- editing the col.emz file with a hexadecimal editor
- editing the Alpha layer of the dds where the texture is

1) edit the col.emz file

First I use piecemontee's SF4Explorer to identify the objects names and find them easier in the hex-editor

link: Free File Hosting Made Simple - MediaFire (you can get a newer version but this one is enough for names)

Reminder: to see objects names in SF4Explorer we are going to look at the cos.emz file, but it's the col.emz file we are going to edit (both are linked).
This step isn't required, but it's such easier when you know the true names of things, instead of having to look for them one by one, doing blind tests...

Ok... there the skirt was obviously "Skirt", but "Hatimaki" for her hairband was quite harder to figure...

Now you know the name of the thing you want to edit, open the col.emz of your mod (not the original col.emz, the unarchived one -dat, emb, name it... I rename mine .emz just after I unarchive them to .emb with quickbms-) under a hex-editor and do a search on that name:
Now scroll down a bit to the line "BrushA":
See those 40 characters outligned? You'll have to edit them:

For full transparency (removing objects, holes, ripped clothes) change them by those 40:
(I'll test on Sakura's skirt)

For semi transparency (Rose's pants) change them by those 40:
(I'll test on Sakura's hairband)
Ok, now that first step is done, save your col.emz and let's edit that texture.

2) edit the .dds file

Firstly what is an Alpha layer?

It's a layer in addition to basic color layers (RGB) that will create transparency (a white layer without colors, only black & white -and shades of grey-).

You find it here in Photoshop:

If it's here, no problem, your .dds file is in DXT5 format.
If it isn't there, the .dds file should be in DXT1, you'll have to add one yourself.

To know the DXT format of your .dds files I recommend downloading Windows Texture Viewer from the NVIDIA site: it shows the DXT.
link: Windows Texture Viewer
To show you the effect of semi transparency, I put a big rectangle with a gradient from white (visible) to black (invisible) on Sakura's hairband:
(on screen: Alpha layer alone)

To show you full transparency, I draw some simple shapes on her skirt:
(on screen: RGB layers and Alpha layer displayed together: the black of the Alpha layer is shown in transparent red under this display mode in Photoshop)

Then I inject the .dds back in the col.emz file...

And here is the result:
Have fun!

Credits goes to sn00pee for all his finds on the subject.

edit:

*forgot to mention an important thing:
Full transparency works if you save in both formats, DXT1 1bit alpha or DXT5.
Semi transparency only works if you save in DXT5.

sn00pee (again) found a way to inject bigger files in .emz without crashing the game here.
(I think the guy that created Rose Ninja used that method on the *cough*second color*cough*)

Wednesday, July 6, 2011

SSF4AE PC Moveset Swap Tutorial

Thanks to Capcom's decision to forego emz containers and their associated headaches, moveset swaps are extremely easy to do now and they're not plagued by the "monkeyface" problem we all know so well.

Here's how you do it:
Step 1: Make a backup of your AE installation. If you mess something up, this will save you a lot of time, I promise.

Step 2: Pick 2 characters: 1 whose moveset we'll be taking (the donor) and 1 who will be receiving those moves (the recipient). For this example, I will use Hakan as the donor and Ryu as the recipient (i.e., Ryu with Hakan's moveset).

Step 3: Go to the resource/battle/chara directory and find your donor's folder, in this case HKN. In this folder, copy all of the files from HKN.cam.ema down to HKN.vfx.ttex.emz EXCEPT for HKN.fce.ema and copy them somewhere (a working folder where we have write permissions is appropriate).

Step 4: Rename all of those files we just copied to match our recipient's character prefix, in this case RYU. Now, go back to resource/battle/chara and copy them into our recipient's folder, overwriting the ones that are already there (it's cool, you backed everything up anyway, right? Right??).

Step 5: Now, this is the key step: navigate to your donor's "latest" moveset files, which are located in dlc/03_character_free/battle/regulation/latest/ for normal characters (I'll update this post with the AE character's locations when I get home). Take the donor's bac and bcm files, in this case HKN.bac and HKN.bcm, copy them to our working directory and rename them to our recipient's character prefix.

Step 6: Finally, we take our renamed bac and bcm files and drop them into our recipient's folder in dlc/03_character_free/battle/regulation/latest/ (assuming they're a normal character and not AE-specific), overwriting what's there.

That's it. All done!

I'm going to explain a little bit about what we've just done, so read over it if you're interested:

The actual moves and animations are stored in the .bac and .bcm files, which were previously components of the *.cmn.emz bundles in vanilla SF4. When they were bundled, we had to open the entire bundle in a hex editor and find the desired files and names to edit manually. However, since Capcom stopped using the bundles, we can just rename the files and be done with it.

Now, you'll notice in step 3 we omitted the *.fce.ema file, which contains the character's face animation data. By doing so, we've let Ryu--our recipient--keep his original face animation data, thus avoiding the monkeyface for the most part.

Last, I wanted to mention the various revisions of moveset files included in the AE installation. The ones included in the resource/battle/chara directory are the regular, non-AE movesets, which are superseded by the ones located in dlc/03_character_free/battle/regulation/latest/. However, during the challenges/trials, the game reverts to using the SSF4 movesets, which access the resource/battle/chara ones.

Wednesday, June 22, 2011

Solder-less Happ Button Mod for Mad Catz SE Fight Stick

I actually performed this mod about a year ago on my own stick, but never published the pictures or process until now because I didn't think anyone would be interested. However, I've noticed a few threads on the Shoryuken forums with individuals asking for "clickier" alternatives to the sensitive-yet-mushy Sanwa and Seimitsu buttons that are currently preferred by most players, and Happ's products fill that niche quite nicely.

Before I dive in with the mod itself, I'm going to take a few moments to talk about differences between Japanese- and American-style arcade buttons and why someone might prefer one over the other. I'll try to be as objective as possible. If you already know or don't care, feel free to skip straight to the tutorial and pics.

Background

American-style buttons--specifically those from arcade part manufacturers Happ and IL--use a plunger positioned atop a Cherry microswitch, which produces a tangible and audible click when depressed. Japanese-style buttons, on the other hand, use a silent, low-resistance switch that provides little-to-no feedback as to when a button press is registered to the system. This is not to say that Japanese-style buttons are not sensitive, as they are actually significantly more sensitive than the Happ designs, there is simply no indication from the button itself as to when it will register.

Overall, Happ buttons seem to be popular with individuals who also like clicky, mechanical keyboards (like the venerable IBM Model M keyboard, which I use at home), as well as folks who grew up with the American arcade scene (i.e., "old farts," as the kids like to call us).

With that out of the way, lets get started. Some people have laughed at this mod for being "ghetto," but I'll take that over those tacky, overwrought custom sticks so many people seem to favor.

Anyway, as it says in the title, this is a solder-less mod, but you'll still need some additional items (Note: this is a button-only mod; putting a Happ stick into an SE is a much bigger undertaking and I don't recommend attempting it unless you are an experienced modder)

What You'll Need

1. Phillips-head screwdriver. To remove the screws from the bottom of the case.

2. Buttons. I recommend the Happ Competition pushbuttons, which have a low travel distance and convex shape, similar to Japanese-style buttons, but with that same satisfying click as the Happ Classics.

3. .187 quick-disconnects. These connect the stick's board to your buttons. The Japanese-style buttons use .110 quick-disconnects, which are too small for your mighty Happ buttons.

4. Wire. Somewhere around 14 to 16 gauge is good, even a little thicker or thinner should be fine, though you'll want to make sure your quick-releases can grab them properly.

5. Cardboard box. This will be used to make a spacer to provide room for your long-ass American buttons, which run deeper than their Japanese counterparts (/innuendo).

6. Glue. For the aforementioned spacer, which needs to be 2 layers deep. Pretty much any glue should be fine, but you want it to be pretty strong and thick. I used wood glue.

7. Optional. You can use special solderless connectors--like these--to join your wires to the stock wires, but I'll show you a little trick later on that works just fine without any connectors.

Step 1: Remove the bottom plate from the stick

Pretty self-explanatory. Just unscrew the 6 screws (2 in the middle and 1 under each of the 4 rubber feet).

Step 2: Trace the outline of the bottom plate onto your cardboard, twice
Depending on the size of your cardboard, you may have to break down your box. While you're at it, go ahead and draw a second square inside of each, about 1" smaller in each direction.

Step 3: Cut your cardboard

Cut along the lines you just drew such that you have 2x 1" frames of cardboard.

Step 4: Glue the frames together to make your spacer
Put your 2 frames together and glue them. This is your spacer, which provides the necessary clearance for your buttons.

For the next couple of steps, which cover removing the old buttons and putting the new ones in, I recommend replacing 1 button at a time so you don't get the wires mixed up. They're color-coded, but if you lose track of which wires go with which button, you'll have to do a bunch of trial-and-error testing at the end to get everything sorted out. Anyway...

Step 5: Pop out your stock buttons

They have a little clippy thing that holds them in:
If you press it in with a screwdriver or whatever, you should be able to pop them out without much trouble. Make sure you disconnect the wires from the bottoms first.

Step 6: Connect your new wires to the old button connectors

You can use the aforementioned optional solderless splicers or you can do what I did: strip the end of your new wire, pull back the rubber sleeve thing from the old .110 quick-disconnects, wrap your bare wire around the old quick-disconnects
and then slide the rubber sleeve over the whole thing. The connection will be fine and the sleeve will hold everything in place nice and tight. :D
Step 7: Add your new buttons

Not much to this step. Just stick 'em in there, screw on the included nut until it's tight and then clip in the included Cherry microswitch. It's a tight squeeze in the tiny SE case, so you'll want to take that into consideration. Take a look at my finished layout:
Step 8: Connect your buttons and test it out

Crimp your .187 quick-disconnects to stripped ends of your new wires and then connect them to your new Happ buttons. One wire connects to the bent post on the side of the microswitch and one connects to the nearest post on the bottom, as shown in the previous pic. Important: if the quick-disconnect on the side touches the bottom plate of your stick, it will ground itself and cause a button press to register (this is bad). To prevent it, you can tape/glue a piece of paper or plastic (I used one of those anti-static bags that an old computer motherboard was shipped in) to the inside of the plate, just to be extra-cautious.
At this point, you should be ready to test your buttons out. Make sure the wires are all connected to the correct button (i.e., the buttons execute the correct actions in-game). If any of them act like they're always pressed until you actually press the button (i.e., its response is backwards), then you've attached the wire to the wrong post.

Step 9: Replace the bottom plate

Once you're sure everything works properly, just cram your wires into place and screw the bottom back on. With the spacer, the screws should be just long enough to catch if you press firmly on the bottom plate. However, they probably won't be able to hold the rubber feet in place securely and you'll probably lose them (though I imagine most of you are like me and have long since lost those rubber feet anyway).

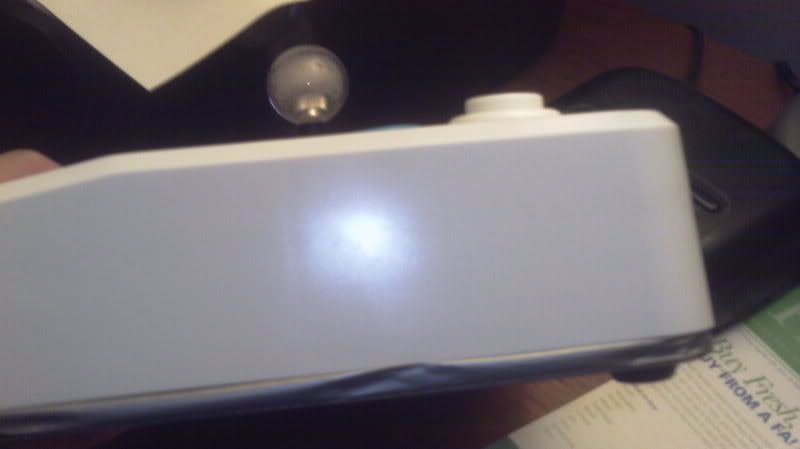
Here's what it looks like from the side. Yes, the cardboard is visible (though not particularly noticeable), and yes, people will probably make fun of you for it.
If you have any questions about the process, hit me up in the comments.

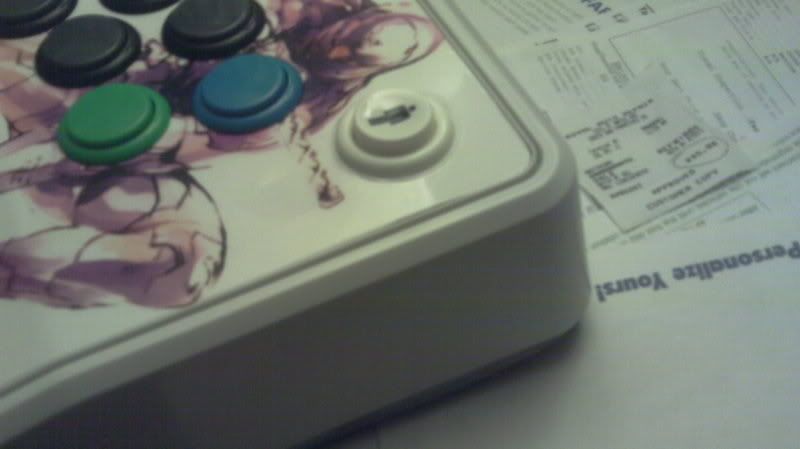
UPDATE: Reader sfkingalpha had the clever idea of covering the cardboard edge with duct tape, which greatly improves the appearance compared with nekkid cardboard:
"Aside from aesthetics, I think this also helps with air tightness and cardboard deterioration!"
Looks great, sfkingalpha!

He was also able to keep his rubber feet by getting longer screws, specifically 3/4 SS panheads.

Here's his finished product:

Analytics Tracking Footer