“Whatever you now find weird, ugly, uncomfortable and nasty about a new medium will surely become its signature. CD distortion, the jitteriness of digital video, the crap sound of 8-bit - all of these will be cherished and emulated as soon as they can be avoided. It’s the sound of failure: so much modern art is the sound of things going out of control, of a medium pushing to its limits and breaking apart. ... The excitement of grainy film, of bleached-out black and white, is the excitement of witnessing events too momentous for the medium assigned to record them.” -Brian Eno
I've been working on some shaders lately.
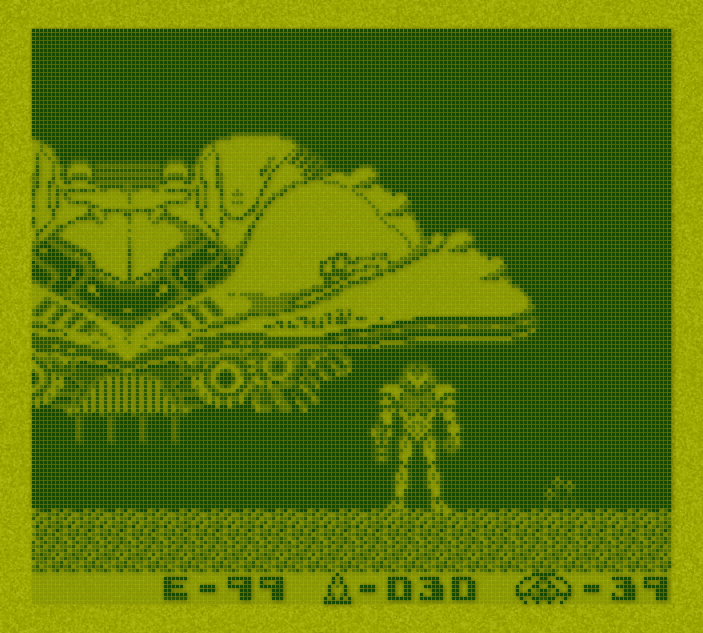
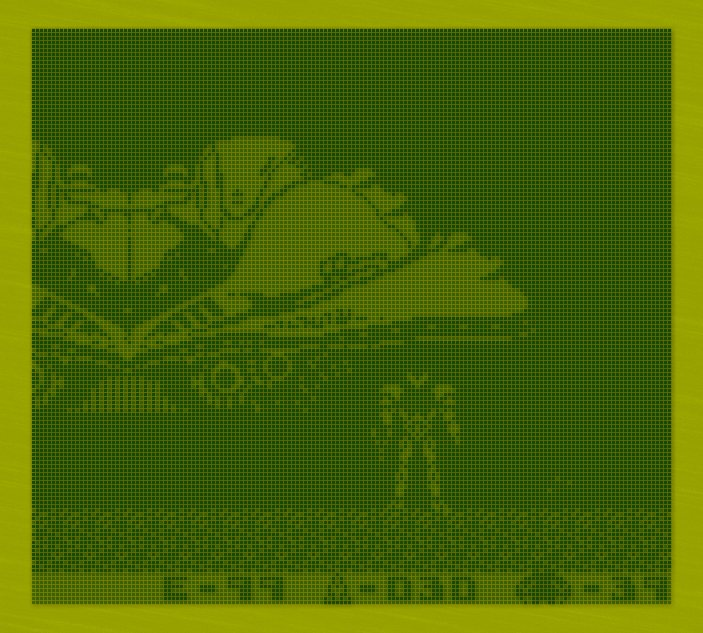
The first one I want to talk about was inspired by some posts on the RetroArch/libretro subreddit, where a guy was using overlays (I think? might have just been photoshops) to make some really dark images of Game Boy Color games that mimicked the experience of using their technically awful front-lit LCD screens.
I never owned a GBC, and only played on a GBA very briefly in its day, but the enthusiastic response to those shots was really something, and it highlighted a significant unmet need that I had never really considered before. So, I borrowed a friend's GBA 001 and set to work on it, and here's what I came up with (as always, click to embiggen):

My addition darkens the image (adjustable how dark you want the ambient light), desaturates it, and then adds a point light source, the focus of which you can adjust (diffuse, like an overhead light, or more focused like a lamp or even a "worm" light attachment) and move around (by default, it's in the upper-right corner, like an overhead light). Direct light washes out whatever is under it, but indirect light fades off quickly, and some of the colors get inverted in the semi-lit area.
I also added in a "shmutz" effect using a dirty glass texture, which only really shows up when it's directly lit, along with a slight green tint that those old LCDs had under direct illumination.
There's also a "Nighttime Car Mode," which makes a bright light sweep across the screen every few seconds to simulate a car passing under streetlights in the night, which is a situation people seem to have a perverse nostalgia for.
While I was working on my shader, Matt Akins was exploring another idea that had been teased by that same redditor, of showing a rainbow pattern at certain angles due to a quirk of the GBC LCD's internal structure. He added this functionality to his pixel transparency shader, and he also submitted a patch to RetroArch to enable gyro and accelerometer control hooks to the shader backend. I was planning to work on this, too, but I'm thankful that Mr. Akins got to it first because he did a much better job than I would have.
With that in place, I added an option to control the light source using gyro control, which makes for a very uncanny gaming experience, tilting a controller to shine a virtual light source on a virtual crappy screen, but then seeing hints of rainbowing as you tilt it. Fun stuff.
I also made a modification of the 'gbc' console-border preset, which looks pretty nice, but the light source only affects the screen and would have required a lot of invasive changes to work on the border, too, so I didn't think it was worth the trouble. Ultimately, it's not my favorite, but it still works well for people who really want a border.

First off, monochrome CRTs don't have subpixels or masks. The entire screen surface is coated with a layer of powdered phosphor material that glows when the electron gun scans over it. Having this direct view of the beam makes the dynamic width very visible, and the beam itself has a bit of ... life to it.
I tried to capture that, and, as a result, static screenshots aren't going to look very good or capture the "magic," so I recommend trying the presets live / in person, if you have the inclination. Nevertheless, here's what it looks like:


In addition to the beam perturbations, this preset also has the scanline brightness cranked up really high, which brings in some general glow visible around the numbers, and it also makes some nice trails anywhere there's movement (courtesy of the 'glow-trails' shaders I made several years ago):

Both of these presets include my analog service menu shader, which lets you adjust lots of physical CRT parameters, like h- and v-size, pincushioning, etc., as well as a version of crt-royale's geometry control that I isolated just for this. It allows you to tilt the monitor up/down/left/right and control the radius of its curvature, among other tweaks. I picked a really exaggerated, low-radius curvature, since these displays were often very small (sub-15 inches), but I used the pincushion control to flatten the middle out some, just as you would on such a small display.
These presets also leverage blurbusters' and Timothy Lottes' crt-beam-simulator shader whenever shader subframes are enabled, and, in addition to the motion clarity improvements, I think the flicker it introduces provides another level of verisimilitude that I wasn't able to capture properly in still shots.
The monoCRT shader also includes several different monochrome phosphor colors:

Just be sure to use integer scaling with this shader, since the scanlines look like crap otherwise. As usual, it looks better when it has more pixels to work with, and I think 5x scale is a minimum, making integer overscale on the Y axis a great way to experience these on 1080p displays.
So that's what I've got. The 'frontlit-reflective' shader is available in handhelds/shaders, and monoCRT is available in crt/shaders, if you want to use them in your own presets. Most of the presets I've shown here (authentic-gbc-frontlit, black-and-white-tv, and apple-monitor-ii) are available in the 'presets' directory. Aside from the beam sim effect and the gyro controls, which aren't widely supported outside of RetroArch, these shaders should work fine anywhere you can load slang shaders (e.g., ares, snes9x, OpenEmu, etc.).