Showing posts with label CRT. Show all posts

Monday, April 6, 2026

Some Shaders I've Been Working On

“Whatever you now find weird, ugly, uncomfortable and nasty about a new medium will surely become its signature. CD distortion, the jitteriness of digital video, the crap sound of 8-bit - all of these will be cherished and emulated as soon as they can be avoided. It’s the sound of failure: so much modern art is the sound of things going out of control, of a medium pushing to its limits and breaking apart. ... The excitement of grainy film, of bleached-out black and white, is the excitement of witnessing events too momentous for the medium assigned to record them.” -Brian Eno 

I've been working on some shaders lately. 

The first one I want to talk about was inspired by some posts on the RetroArch/libretro subreddit, where a guy was using overlays (I think? might have just been photoshops) to make some really dark images of Game Boy Color games that mimicked the experience of using their technically awful front-lit LCD screens.

I never owned a GBC, and only played on a GBA very briefly in its day, but the enthusiastic response to those shots was really something, and it highlighted a significant unmet need that I had never really considered before. So, I borrowed a friend's GBA 001 and set to work on it, and here's what I came up with (as always, click to embiggen):

screenshot - presets/authentic-gbc-frontlit.slang
Rather than reinvent several wheels, I'm leaning on fishku's "authentic-gbc" LCD shader, which includes the characteristic little dog-ear on each subpixel, as well as Matt Akins lovely "pixel transparency" shader, which makes the white pixels appear transparent and adds a little drop shadow to them.

My addition darkens the image (adjustable how dark you want the ambient light), desaturates it, and then adds a point light source, the focus of which you can adjust (diffuse, like an overhead light, or more focused like a lamp or even a "worm" light attachment) and move around (by default, it's in the upper-right corner, like an overhead light). Direct light washes out whatever is under it, but indirect light fades off quickly, and some of the colors get inverted in the semi-lit area.

I also added in a "shmutz" effect using a dirty glass texture, which only really shows up when it's directly lit, along with a slight green tint that those old LCDs had under direct illumination.

There's also a "Nighttime Car Mode," which makes a bright light sweep across the screen every few seconds to simulate a car passing under streetlights in the night, which is a situation people seem to have a perverse nostalgia for.

While I was working on my shader, Matt Akins was exploring another idea that had been teased by that same redditor, of showing a rainbow pattern at certain angles due to a quirk of the GBC LCD's internal structure. He added this functionality to his pixel transparency shader, and he also submitted a patch to RetroArch to enable gyro and accelerometer control hooks to the shader backend. I was planning to work on this, too, but I'm thankful that Mr. Akins got to it first because he did a much better job than I would have.

With that in place, I added an option to control the light source using gyro control, which makes for a very uncanny gaming experience, tilting a controller to shine a virtual light source on a virtual crappy screen, but then seeing hints of rainbowing as you tilt it. Fun stuff.

I also made a modification of the 'gbc' console-border preset, which looks pretty nice, but the light source only affects the screen and would have required a lot of invasive changes to work on the border, too, so I didn't think it was worth the trouble. Ultimately, it's not my favorite, but it still works well for people who really want a border.

The other shader I've been working on is a CRT shader. Yes, another one, because there aren't enough already. This one focuses on monochrome displays, which are usually just an afterthought in CRT shaders, and monochrome modes don't usually exhibit any special characteristics vs the color-full settings. This is unfortunate, I think, because monochrome CRTs are cool devices that ruled the land for decades, even after color TVs were commonplace.

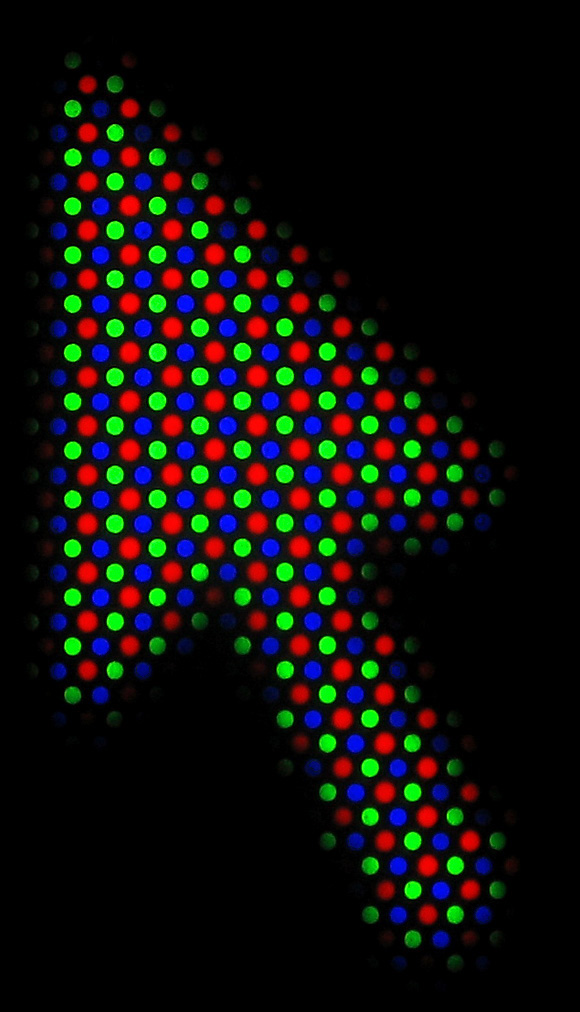
First off, monochrome CRTs don't have subpixels or masks. The entire screen surface is coated with a layer of powdered phosphor material that glows when the electron gun scans over it. Having this direct view of the beam makes the dynamic width very visible, and the beam itself has a bit of ... life to it.

I tried to capture that, and, as a result, static screenshots aren't going to look very good or capture the "magic," so I recommend trying the presets live / in person, if you have the inclination. Nevertheless, here's what it looks like:

That's the 'black and white tv' preset, which is intentionally pretty blurry, horizontally. Monochrome computer monitors could be quite sharp, though, and there's an "apple-monitor-ii" preset that handles that better:


In addition to the beam perturbations, this preset also has the scanline brightness cranked up really high, which brings in some general glow visible around the numbers, and it also makes some nice trails anywhere there's movement (courtesy of the 'glow-trails' shaders I made several years ago): 

Both of these presets include my analog service menu shader, which lets you adjust lots of physical CRT parameters, like h- and v-size, pincushioning, etc., as well as a version of crt-royale's geometry control that I isolated just for this. It allows you to tilt the monitor up/down/left/right and control the radius of its curvature, among other tweaks. I picked a really exaggerated, low-radius curvature, since these displays were often very small (sub-15 inches), but I used the pincushion control to flatten the middle out some, just as you would on such a small display.

These presets also leverage blurbusters' and Timothy Lottes' crt-beam-simulator shader whenever shader subframes are enabled, and, in addition to the motion clarity improvements, I think the flicker it introduces provides another level of verisimilitude that I wasn't able to capture properly in still shots.

The monoCRT shader also includes several different monochrome phosphor colors:

Just be sure to use integer scaling with this shader, since the scanlines look like crap otherwise. As usual, it looks better when it has more pixels to work with, and I think 5x scale is a minimum, making integer overscale on the Y axis a great way to experience these on 1080p displays. 

So that's what I've got. The 'frontlit-reflective' shader is available in handhelds/shaders, and monoCRT is available in crt/shaders, if you want to use them in your own presets. Most of the presets I've shown here (authentic-gbc-frontlit, black-and-white-tv, and apple-monitor-ii) are available in the 'presets' directory. Aside from the beam sim effect and the gyro controls, which aren't widely supported outside of RetroArch, these shaders should work fine anywhere you can load slang shaders (e.g., ares, snes9x, OpenEmu, etc.).

Friday, February 28, 2020

CRT shader masks

There are 3 main types of masks used by CRT displays:
Slot Mask staggered grid

slot masks - also known by the brand name "Cromaclear" and/or "in-line shadow mask". These are probably the mask you're most familiar with, as they were used on most consumer televisions. They are characterized by the familiar staggered grid of red, green and blue phosphors.

Aperture Grille wires
aperture grille  - also known by Sony's brand name "Trinitron", this technology was also manufactured by other companies under slightly different names, such as Mitsubish's DiamondTron and ViewSonic's SonicTron. This mask technology is especially popular among retro-gaming crowds as a result of its brightness and vibrancy.


Shadow Mask Triad
shadow mask - the "triad" form of which is most commonly seen in PC monitors. The nomenclature on slot and shadow masks is apparently interchangeable, for the most part, though in retro-gaming, they're usually disambiguated such that "shadow mask" only refers to the triad type and "slot mask" only refers to the rectangular grid type.

When we attempt to reproduce these masks on modern displays, the simplest solution is to take an image of the phosphor layout, shrink it down and tile it across the image, then combine the game image with the phosphor image in some way (multiplication or screen combine are common). This is a simple and straightforward strategy that works well at very high resolutions, but it can become a real mess at lower resolutions as a result of the physical display's subpixel structure (see the pink and green patterns in CRT-Royale's mask at 1080p).

CRT-Royale's tiled images of phosphor layouts at 1080p


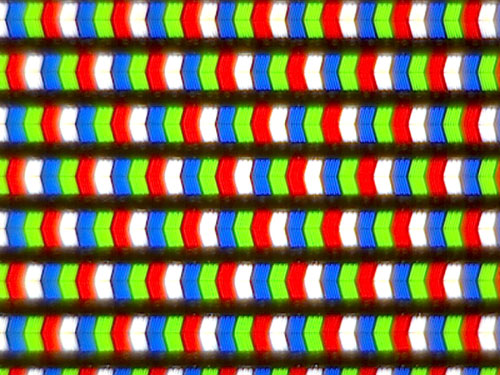
Just like a CRT, LCD monitors display colors by shining light through tiny lenses at various intensities and they combine to form the colors you see. These phosphors are usually much smaller than what you find on a CRT TV, but very fine details can still be distorted by these structures. Very small text is probably the place where we encounter these limitations most often and, back in the late 1990s, companies started trying to improve the situation using subpixel-based rendering techniques under the names ClearType, FreeType, etc. These techniques work with the LCD subpixel structure to give the illusion of higher resolution than the monitor is actually capable of displaying cleanly.

We can use some of these same tricks in our CRT reproduction shaders to produce better mask effects at lower resolutions, without the chromatic aberration caused by averaging together colors at the subpixel level. These patterns rely on the physical pixel structure of the display monitor, so they need to be tiled using gl_FragCoord (or texCoord.st * OutputSize.xy) so the tiling always matches up.

cgwg's crt-geom subpx aperture grille
 The most basic mask that exploits the RGB subpixel structure is a simple alternating green and magenta pattern. When displayed on a normal RGB screen, it makes perfectly evenly spaced lines of red, green and blue, which results in a very passable aperture grille, even at 1080p. This pattern was popularized by cgwg's venerable CRT shader (aka crt-geom).

At 1080p, this looks analogous to a low-TVL Trinitron TV (shader on the left, PVM on the right):
PVM shot from here, perspective-corrected in GIMP
While at 4K, it looks very much like a high-TVL monitor, like a BVM (click to see more details):
 The next simplest pattern is just that same pattern doubled vertically and mirrored horizontally on each successive line, for a green and magenta checkerboard. This results in a pretty decent shadow mask triad pattern that looks pretty legit at 1080p, though it's probably too tight for anything much larger than that. That is, at 4K and higher, it's pretty much invisible unless your nose is right on the screen.


 Here's a detail comparing the subpixel-respecting strategy with a naive tiling approach at 1080p:
 
By extending the pattern and adding in some black pixels, we can get an okay/not great slot mask. As with the previous patterns, the RGB pattern looks good, but since we're limited by the physical pixel size, the black crossbars are unfortunately over-represented, making the image significantly darker than it should be. However, we can compensate for this somewhat just by reducing the strength of the mask effect within the shader.
 At 1080p, the TVL of the simulated display is unrealistically low (like, maybe a really crummy portable TV or something), but at 4K this mask gets more realistic in terms of scale.

At 8K, though, you can start drawing much better, more accurate phoshor patterns while still maintaining a realistically usable TVL, though the tiled patterns start getting pretty weird.

Funky slot mask pattern
The results look good, but it's worth noting that at these resolutions, naive tiling doesn't look too shabby, either, especially with a few feet of distance between the viewer and the monitor.


crt-lottes rotated mask
Another totally different strategy is to flip the phosphor grid 90-degrees to avoid the uneven subpixel spacing altogether. This isn't "accurate" to the way CRT masks actually look, but it sidesteps a lot of the problems caused by trying to reproduce them on modern displays, including problems caused by variations in subpixel layouts (that is, not all LCDs use nice, clean R,G,B arrays; some use RGBW, RGBY or BGR and some, like OLEDs, use a crazy layout that looks totally alien; see here for more: https://geometrian.com/programming/reference/subpixelzoo/index.php). This strategy is used in Timothy Lottes' "FixingPixelArt" shadertoy, on which the crt-lottes shader is based.

Many subpixel-respecting mask patterns can be found in LUT form alongside cgwg's crt-geom-deluxe shader, including some of these and some others I didn't mention (mostly aperture grille variations that work at higher resolutions, like 4K and 8K. You can also find these and others in my subpixel_masks shader snippet, which is designed to be #include-d in other shaders for easy mask-generation and uses an expensive but very informative array-based syntax so the patterns are easier to visualize and understand.

Thursday, June 7, 2018

Trading Moire for Noise in Shaders

Note: the ugly artifacts we're trying to deal with in this post also happen whenever you up/downscale images, so be sure to click the thumbnails to view at full resolution.

A lot of folks like to apply a pincushion/curvature effect to their emulator image to try and capture a bit of the old CRT TV curved tube effect. This can be a problem, though, when paired with a scanline effect, since the curvature introduces an aliasing artifact on the scanlines known as a "moire pattern":
This is a worst-case scenario, used for illustrative purposes.
Notice the ugly pattern fanning out from the middle of the outside edges of the screen
This problem comes up a lot in virtual reality applications, where content often runs through a pincushion effect to compensate for the lens distortion of head-mounted displays, which then leads these same ugly patterns to crop up on any design with parallel/converging lines.

Graphics programmer Timothy Lottes (author of the popular FXAA algorithm and a lovely public domain CRT shader, among others) was working on ways of dealing with the aliasing/moire problem for VR and published this shadertoy showing how to hide it by introducing jitter/noise in where the texture is sampled. Turns out that same strategy can be used to mitigate our scanline moire.

When applied to an actual game image, this:
becomes this (caution, big animated gif; the noise effect doesn't really work in still images):
You can see that the noise is concentrated along the same areas where the moire pattern was visible before, but it's much less obtrusive and sort of melts away when viewed at a distance.

When curvature is added to an existing, normally flat CRT shader (Themaister's crtglow-gaussian shader, one of my favorites), we go from this:
to this, with the noise/jitter-based mitigation:
In this example, the noise also adds a touch of analog warmth/sparkle to the CRT effect, which I like.

Here's the code snippet that does it (all copyrights belong to Mr. Lottes):
This code can be added to many CRT shaders by wrapping the shader's fragment texcoord declaration with the moire_resolve() function to add the jitter/noise and then wrapping that with the Warp() function to add the curvature. You can see an example of where I've done exactly that in the crtglow-gaussian shader here to create the screenshots above.

Update 12/1/2018: A more traditional--and highly effective--method of moire removal is through elliptical weighted average (EWA) filtering, as described here. Fellow shader enthusiast torridgristle whipped up a GLSL version with curvature, which can be added after CRT/scanline shaders to look like this:
It's quite fast, too, making it a very good, flexible choice for curvature plus moire-mitigation.

Thursday, May 3, 2018

Shaders for Low-Power Machines

This started out as one big post with a bunch of new and new-ish shaders, but I decided to bust it up and hopefully make this a little more useful and focused. Be sure to check out the next post for some more fun shaders.

While there's no shortage of heavy-weight, gorgeous shaders that will make even a modern gaming GPU howl, a lot of people use older machines, single-chip computers (such as Raspberry Pis) and machines with integrated graphics that simply don't have the grunt to take on those hefty shaders. It can be tedious digging through the hundreds of shaders available to try and find the few that might work on lower-powered GPUs, so I wanted to present a few of those here.

As always, click the thumbnails to to embiggen.

Lightweight CRT Shaders
CRT-Potato
bparker created these shaders with the goal of bringing some of the more popular CRT effects to even a "potato" of a computer. They work by tiling a tiny lookup-texture across the entire screen.
The 'cool' version has a bit of a blue tint to it, but this can be helpful in making purple stuff, like the sky in Super Mario Bros and the water in Secret of Mana, a little bluer:
The 'warm' version is patterned after the 'kurozumi' preset for CRT-Royale:
zfast-CRT
Written by SoltanGris42, this shader is intended to run full speed on and work around some of the GPU quirks of the SNES Mini/Classic and can also reach full speed on a RPi3 at resolutions of up to 1920x1080 or even 1600x1200:
fakelottes
CRT-Lottes is a great shader, but the bloom and scanline effects are a too much for many weaker machines, so I took the beautiful mask code and combined it with a basic scanline shader to produce something that's still reasonably handsome and should run full speed on a RPi3:
It's also worth noting that fakelottes' scanline code looks pretty decent even at non-integer scales.

CRT-Pi

I think I've covered this one--written by davej--before, but it's worth mentioning again because it looks great and is designed specifically around the constraints of the Raspberry Pi GPUs (RPi1, RPi2 and RPi-Zero need to be overclocked for 1080p/60):

LCD Grid
zfast-LCD
Another lightweight shader from SoltanGris42, this shader does nearest-neighbor scaling and then darkens the border pixels to mimic a low-res LCD pixel grid. The thickness and darkness of the grid are adjustable:
simpletex_LCD
From jdgleaver, this shader is mostly intended for use with non-backlit systems, like the original Game Boy, Game Boy Color and Game Boy Advance, but it looks cool with pretty much anything. It uses the line-weighting equation from zfast-LCD but adds a lot of nice options and a cool background texture effect:

Basic Scanlines
RiskyJumps and I had similar inspiration for these shaders: what is the essence of a scanline effect?

Scanlines-Sine-Abs
Requring just a bare handful of GPU cycles to process, this shader just draws a vertical sine wave across the screen, which makes for a pleasant, rounded scanline effect that looks pretty decent even at non-integer scales:
 Scanline-fract
In contrast, my scanline-fract shader looks just awful at non-integer scales. However, it scales up nicely to any integer and draws even black lines (or as dark as you please) across the screen with any thickness (in pixels) you choose. The default thickness is a half-pixel, but you can make them thinner or thicker:

Smoothing/Interpolation
xBRZ-Freescale-Multipass
I don't know if this shader will run on an RPi3 or not, but it's certainly very fast. By leaving out the pixel rasterization step, aliaspider was able to get sharp edges at any scale and without the computation burden of that process. On my crummy office workstation GPU (a Radeon 200-series), it gets well over 1,000 frames per second. Even so, it looks great and has the fantastic edge/corner detection of the xBRZ filter/shaders (look at that circle-c!):

Sharpest Pixels
While "Pixellate" is the perennial favorite for this task--that is, getting the absolute sharpest pixels without having the uneven pixel sizes associated with nearest-neighbor at non-integer scale factors--some GPUs are just too slow for the many texture samples required for it. I'm not going to show any images here because there's not much to see, but the sharp-bilinear shader prescales the image with nearest-neighbor to the largest integer and then uses bilinear scaling for the remaining fractional scaling. Since it uses the GPU's built-in scaling hardware, it's practically free. In fact, you can do the exact same thing manually by putting in a pass of the stock shader at the desired integer scale and then scaling the rest of the way with bilinear (if bilinear filtering is disabled, you can do this explicitly by setting another stock pass with "don't care" for the scale factor and "linear" for the filtering method).

Sunday, March 5, 2017

Raspberry Pi 240p Composite Output

Big news for emulation on Raspberry Pis of any generation: a new firmware update has enabled 240p output through the composite video-out port (a dedicated port on older models and a combo 3.5 mm jack on newer models).

From Raspbian and its derivatives, you can run from a terminal:
sudo rpi-update
and it will automatically install the new firmware. For Lakka, the updated firmware will make its way into the main release at some point, but in the meantime, you'll need to mount your SD/microSD card on another machine and then find the 'boot' directory (for Lakka, this will be located in the ~500 MB partition that holds the system files rather than the bigger partition that holds your games) and make a backup in case anything goes wrong (not likely, but better safe than sorry).

Next, you'll need to download the new firmware files from github (here's a direct link to a zipped download) and copy them into the boot directory, overwriting what's already there. I believe you only really need a subset of the files (bootcode.bin, fixup.dat, fixup_cd.dat, fixup_db.dat, fixup_x.dat, start.elf, start_cd.elf, start_db.elf and start_x.elf), so if it acts strangely, maybe try cutting down to just those files.

In your config.txt, you can use the sdtv_mode directive to change to the new modes (either NTSC or PAL):
sdtv_mode=16    # progressive NTSC
sdtv_mode=0x10  # progressive NTSC (using hex notation)
sdtv_mode=18    # progressive PAL
sdtv_mode=0x12  # progressive PAL (using hex notation)
Also, make sure your config.txt isn't forcing HDMI output via hdmi_force_hotplug=1 (comment it out, if so) and you might want to force composite output, just to be sure, by adding hdmi_ignore_hotplug=1.

Raspbian and derivatives can now also change modes at runtime using the tvservice program:
$ tvservice -c "NTSC 4:3" ; fbset -depth 8 ; fbset -depth 32; tvservice -s 
Powering on SDTV with explicit settings (mode:0 aspect1)state 0x40001 [NTSC 4:3], 720x480 @ 60.00Hz, interlaced
for interlaced mode or:
$ tvservice -c "NTSC 4:3 P" ; fbset -depth 8 ; fbset -depth 32; tvservice -s 
Powering on SDTV with explicit settings (mode: 16 aspect:1)state 0x40001 [NTSC 4:3], 720x480 $ 60.00Hz, progressive
for 240-line non-interlaced mode.

Now, you'll notice that the above line still says 720x480 and applications will still see a 480-line resolution (that is, emulators will want to run at 2x scale). That's because the firmware still acts like normal 720x480 (or 576 lines for PAL) and the composite encoder just displays only half the lines.

This is actually to our benefit because it allows us to easily go back and forth at runtime and has the potential for on-the-fly switching (though RetroArch/Lakka doesn't support that and probably never will). It also allows emulators to show interlaced content without freaking out (that is, a "true" 240p resolution would cut off half of the picture, while this setup will just blank out every other line, which is much less obtrusive).

I have some pics here but, hilariously, the one from the new firmware turned out the worst:
RPi 240p Composite

Analogue Nt - RGB-PPU YPbPr

RPi 480i Composite
If you look closely, you can see that the RPi 240p shot has gaps between each scanline (easier to see on the green waves of the hill than on Luigi), while the 480i shot does not. What the still image can't show is that the 240p image is rock-solid stable, while the 480i image flickers sickeningly. Either way, the RPi composite output obviously does proper NTSC encoding, so blending of dithering and so on happens automatically without needing a shader, which is nice. EDIT: the NTSC encoding is (obviously, in retrospect) using the RPi's full 720 horizontal res timing rather than a console's native timing, so effects that depend on NTSC artifacting may or may not look like you would expect. For example, here's what the "tvpassfail" NTSC test ROM *should* look like:
NTSC Pass/Fail test ROM with maister's NTSC 256 px shader
But this is what the RPi's composite output actually shows:
NTSC Pass/Fail test ROM via RPi composite output
There's still crosstalk, of course, but it's spread across more pixels, which breaks the test. Perhaps unsurprisingly, it looks closer to the 320 px NTSC shader output:
NTSC Pass/Fail test ROM with maister's 320 px shader
With this new firmware, the RPi3 is now arguably the best/easiest/cheapest way to do proper 240p emulation on a typical NTSC standard-def television. Previously, a softmodded Wii was the undisputed champ in this area, as it was the only way to do 240p without putting a series of adapters and converters in the mix. The Wii still has an advantage insofar as it can output a high-quality YPbPr signal (i.e., comparable to the Analogue Nt shot above) but the RPi3 has the ability to emulate more consoles, including great Playstation 1 emulation via PCSX-ReARMed and decent N64 emulation via the core formerly known as GLupeN64 (now renamed to just Mupen64Plus-libretro). The Pi2SCART add-on from ArcadeForge can get a cleaner, "pixel perfect" output from emulators on the RPi, but at ~$50, it costs significantly more than the RPi itself, costs as much as a used Wii and requires adapters to work with standard NTSC televisions. So, in my opinion, RPi is the way to go for cheap/easy "240p" emulation on a regular ol' U.S. TV, while the Wii is a step up in visual quality but more of a hassle (and fewer games/consoles available to emulate). Pi2SCART wins in both respects but also adds significant cost.

Friday, March 4, 2016

New and Updated Shaders

It's been awhile since I've done any shader posts, so I figured I'd cover some updates that have happened recently. Same format as usual, the only difference this time around is that instead of zooming into screenshots using photoshop, I made them straight from RetroArch using the 'zoom' from my image adjustment shader. This gives sharper, cleaner detail shots. Anyway...

No Shaders (Nearest Neighbor)

Here is a shot with no shaders for comparison.


ScaleFx

Sp00ky Fox had been working on cleaning up artifacts from the Scalenx shaders and, in the process, worked up a similar algorithm of his own, known as ScaleFx. By cranking it up to 9x, he managed to do some pretty impressive smoothing:

Some notable things here: check out the circle-c copyright symbol, which is very hard to deal with in this sort of shader, as well as the straight lines throughout the logo and on the shallow slope below the dragon coin.

He also made a variant, known as scalefx-hybrid-9x, that uses reverse-antialiasing and creates some interesting depth and shading effects:

It does introduce some haloing, though, and is pretty heavy, performance-wise.

xBR-lv2-accuracy-multipass

For the past year or so, Hyllian has been working to improve his now-famous xBR upscaling algorithm, mostly by pairing it with other algorithms and working to improve handling of problematic edge-cases. Very recently, though, he changed the way corners are detected and added a new color diff algorithm, which fixes some weird artifacts that could occur when bright red and bright blue pixels were next to each other (artifacts not pictured):

Here is an older version of the same shader for comparison:

Again, the copyright symbol is a good example of the improvements, along with the circles inside the number 9s. The updated version also works quite well with Playstation-era antialiased images, while ScaleFx works best on bold, cartoony graphics, like Super Mario World and Shantae.

CRT-Lottes Updated

Since we first ported Timothy Lottes' scaling pixel art shadertoy, he did a couple of iterations to add bloom and a few more variations on his awesome shadow mask code. r5 incorporated those updates into our port and threw in some runtime parameters (including the aforementioned mask variations):

This is the default compressed TV-style shadow mask^^.

This is the Trinitron-style aperture grille^^.

This is the stretched VGA-style shadow mask that was used in the original shader^^.

And this is another VGA-style mask with larger phosphors^^.

CRT-Royale-Kurozumi Preset

Shmups user Kurozumi posted some really nice settings for TroggleMonkey's CRT-Royale shader that makes it look very much like a high-res broadcast monitor (e.g., Sony's BVM line or the 800-line PVMs):

I put these settings into a cgp preset, located in the 'cgp' subdirectory of the main common-shaders repo.

Analytics Tracking Footer