Showing posts with label happ. Show all posts

Tuesday, August 22, 2017

8bitdo NES30 Arcade Stick Review and Modding Info

I like to play retro games from my couch and I prefer using an arcade stick, but I don't want to have a giant cord stretching across my living room as a tripping hazard. The obvious solution is to get a Bluetooth arcade stick. The only problem: nobody makes them. It seems the people driving the arcade stick market are distrustful of wireless communication due to latency concerns, despite data from a very reputable source suggesting otherwise.

8bitdo had put out a couple of arcade sticks in the past, the FC30 and FC30 Sanwa Edition, but those sticks never got much traction, AFAICT, and they're long-since discontinued now (and I've never seen one come up on eBay). They've revisited the concept recently, though (presumably because their devices are compatible with the Nintendo Switch*, which got a Street Fighter 2 port, and no other company has released an arcade stick for that market), and released their NES30 Arcade stick, which I preordered as soon as I heard about it.

First impressions - Build Quality and Information

The plastic used for the main body of the box feels a little flimsy. It has some flex to it, which isn't encouraging, and there's a lot of empty space inside the stick, though this is actually a good thing when it comes time to start poking around in there. It has a nice, thick, solid metal base with recessed screws and built-in rubber feet, which is a big advantage in my opinion when compared with the flimsy, easily lost rubber feet from the Mad Catz TE and SE sticks (and once the feet were lost, the non-recessed screws would scrape up wooden surfaces and get caught on fabric -_-).

The buttons are knockoff Japanese-style and feel predictably crummy, but passable if you're just going to use it casually. The stick feels pretty decent, really, with none of the gravelly, scraping feelings characteristic of the Mad Catz SE sticks as they slowly ate themselves.

There are 8 full-size (i.e. 30 mm) buttons for A, B, X, Y, R1, L1, R2 and L2 in modern, staggered arcade stick layout, and a smaller button (presumably 24 mm) for Start. There are also smaller non-arcade-style buttons on the control panel for Select, Pair and Turbo. While Select is bindable in gaming software, the Turbo and Pair buttons are not exposed, leaving users with 10 buttons and a 4-way joystick. That is, there is no dedicated "home" button for assigning to "menu_toggle" in RetroArch/MAME.

Wireless connectivity over Bluetooth is quick and painless, and there's no obvious perceptible latency. If you want to play wired and/or charge the stick, 8bitdo has supplied a full-size USB-A-to-A cable, which is, frankly, bizarre. 

Modding

The metal base is held onto the box by 6 small phillips-head screws. Once those are removed, you can pop the base off safely. That is, there is nothing attached to the base that can get yanked out, etc. Once inside, you can see that the wiring is clean and organized, with color-coded wires leading to plastic pin-headers on the board. You can also see the support structure (the hollow tubes surrounding the buttons), which provides a strong backbone where the stick will be seeing the most abuse.
A shot of the insides before I got started on it.
The good news: swapping out the buttons on this stick is a breeze. The stock buttons snap right out and the .110 quick-disconnects transfer over to Sanwa buttons, which are a perfect fit (I swapped in Sanwa 30 mm OBSFS buttons), with no trouble. The stick also has mounting screws that line up perfectly with a Sanwa JLF stick.

The bad news: THIS IS NOT A COMMON-GROUND PCB. That's not a big deal with the buttons (unless you just really like to daisy-chain grounds for tidiness), but it's a very big problem for the stick, since Sanwa and Seimitsu sticks use a common-ground PCB for their switches. In short, this stick is INCOMPATIBLE with Japanese-style sticks without doing some significant modification. Correction: I was totally wrong about this. It is indeed common-ground, and you can just twist up all of the grounds (looking down on the inside of the stick, it's all of the top wires from each signal+ground pair) and attach them to your stick's common ground pin. Dunno what I was doing wrong when I first tried it, but I just now wired up a Seimitsu LS-56 with no issues. So, false alarm.


Speaking of the stick, it has a clip-in square restrictor plate/gate and has the control wires soldered directly to Lema microswitches, from Chinese company Zhejiang Lema Electrics Co. Ltd:
Since they were directly soldered, I needed to cut the wires, making this the first destructive modification so far.

The Lema switches are pretty close in size and shape to the tough-as-nails Cherry microswitches you would find in Happ/IL sticks and buttons, and I decided to swap them out for some I had in an old Happ Competition joystick.
The result is satisfyingly clicky and extremely light (that is, there's barely enough resistance to bring the stick back to center; some people will despise this). I was able to pull off 360/720-degree motions easily and reliably, but I'm not 100% convinced that I want to stick with this setup permanently, so I used insulated alligator clips rather than soldering .187 quick-disconnects to the wires in case I decide to swap it out with other switches in the future.
The extra-roomy case came in handy here for holding my insulated alligator clips
The restrictor plate/gate is held in by 4 little screws and 4 clips. Once the screws are out, the clips are nice and easy to manipulate, unlike the ones on JLF sticks, which are notoriously difficult to work with. I didn't check to see whether Sanwa plates would snap in, but it looks pretty likely. I might swap in an octo-gate at some point and will update this post if I run into any issues. [Update 10/27/2017: by request, I swapped in the Sanwa octo-gate from one of my other sticks and it fit just fine. The Sanwa plate is thicker than the stock plate, so I really had to cram it to get the clips to snap into place, but otherwise, it's no problem.] Here you can see the Cherry microswitches fit in nice and snug under the stock plate:
I didn't get around to testing it, but I suspect the longer, screw-down Happ/IL American-style buttons would fit just fine in the case, since it seems to be a little taller than the Mad Catz SE boxes, which were only about a quarter of an inch too short to fit them comfortably. [Update 10/27/2017: I was wrong, they're almost exactly the same height as the SE box, so the long-stem Happ/IL buttons won't fit, but the short-stem ILs will.]

*Note, the wired vs wireless issue seems to actually be in favor of wireless on the Switch, oddly enough: https://www.youtube.com/watch?v=avvmck40cIw

Wednesday, June 22, 2011

Solder-less Happ Button Mod for Mad Catz SE Fight Stick

I actually performed this mod about a year ago on my own stick, but never published the pictures or process until now because I didn't think anyone would be interested. However, I've noticed a few threads on the Shoryuken forums with individuals asking for "clickier" alternatives to the sensitive-yet-mushy Sanwa and Seimitsu buttons that are currently preferred by most players, and Happ's products fill that niche quite nicely.

Before I dive in with the mod itself, I'm going to take a few moments to talk about differences between Japanese- and American-style arcade buttons and why someone might prefer one over the other. I'll try to be as objective as possible. If you already know or don't care, feel free to skip straight to the tutorial and pics.

Background

American-style buttons--specifically those from arcade part manufacturers Happ and IL--use a plunger positioned atop a Cherry microswitch, which produces a tangible and audible click when depressed. Japanese-style buttons, on the other hand, use a silent, low-resistance switch that provides little-to-no feedback as to when a button press is registered to the system. This is not to say that Japanese-style buttons are not sensitive, as they are actually significantly more sensitive than the Happ designs, there is simply no indication from the button itself as to when it will register.

Overall, Happ buttons seem to be popular with individuals who also like clicky, mechanical keyboards (like the venerable IBM Model M keyboard, which I use at home), as well as folks who grew up with the American arcade scene (i.e., "old farts," as the kids like to call us).

With that out of the way, lets get started. Some people have laughed at this mod for being "ghetto," but I'll take that over those tacky, overwrought custom sticks so many people seem to favor.

Anyway, as it says in the title, this is a solder-less mod, but you'll still need some additional items (Note: this is a button-only mod; putting a Happ stick into an SE is a much bigger undertaking and I don't recommend attempting it unless you are an experienced modder)

What You'll Need

1. Phillips-head screwdriver. To remove the screws from the bottom of the case.

2. Buttons. I recommend the Happ Competition pushbuttons, which have a low travel distance and convex shape, similar to Japanese-style buttons, but with that same satisfying click as the Happ Classics.

3. .187 quick-disconnects. These connect the stick's board to your buttons. The Japanese-style buttons use .110 quick-disconnects, which are too small for your mighty Happ buttons.

4. Wire. Somewhere around 14 to 16 gauge is good, even a little thicker or thinner should be fine, though you'll want to make sure your quick-releases can grab them properly.

5. Cardboard box. This will be used to make a spacer to provide room for your long-ass American buttons, which run deeper than their Japanese counterparts (/innuendo).

6. Glue. For the aforementioned spacer, which needs to be 2 layers deep. Pretty much any glue should be fine, but you want it to be pretty strong and thick. I used wood glue.

7. Optional. You can use special solderless connectors--like these--to join your wires to the stock wires, but I'll show you a little trick later on that works just fine without any connectors.

Step 1: Remove the bottom plate from the stick

Pretty self-explanatory. Just unscrew the 6 screws (2 in the middle and 1 under each of the 4 rubber feet).

Step 2: Trace the outline of the bottom plate onto your cardboard, twice
Depending on the size of your cardboard, you may have to break down your box. While you're at it, go ahead and draw a second square inside of each, about 1" smaller in each direction.

Step 3: Cut your cardboard

Cut along the lines you just drew such that you have 2x 1" frames of cardboard.

Step 4: Glue the frames together to make your spacer
Put your 2 frames together and glue them. This is your spacer, which provides the necessary clearance for your buttons.

For the next couple of steps, which cover removing the old buttons and putting the new ones in, I recommend replacing 1 button at a time so you don't get the wires mixed up. They're color-coded, but if you lose track of which wires go with which button, you'll have to do a bunch of trial-and-error testing at the end to get everything sorted out. Anyway...

Step 5: Pop out your stock buttons

They have a little clippy thing that holds them in:
If you press it in with a screwdriver or whatever, you should be able to pop them out without much trouble. Make sure you disconnect the wires from the bottoms first.

Step 6: Connect your new wires to the old button connectors

You can use the aforementioned optional solderless splicers or you can do what I did: strip the end of your new wire, pull back the rubber sleeve thing from the old .110 quick-disconnects, wrap your bare wire around the old quick-disconnects
and then slide the rubber sleeve over the whole thing. The connection will be fine and the sleeve will hold everything in place nice and tight. :D
Step 7: Add your new buttons

Not much to this step. Just stick 'em in there, screw on the included nut until it's tight and then clip in the included Cherry microswitch. It's a tight squeeze in the tiny SE case, so you'll want to take that into consideration. Take a look at my finished layout:
Step 8: Connect your buttons and test it out

Crimp your .187 quick-disconnects to stripped ends of your new wires and then connect them to your new Happ buttons. One wire connects to the bent post on the side of the microswitch and one connects to the nearest post on the bottom, as shown in the previous pic. Important: if the quick-disconnect on the side touches the bottom plate of your stick, it will ground itself and cause a button press to register (this is bad). To prevent it, you can tape/glue a piece of paper or plastic (I used one of those anti-static bags that an old computer motherboard was shipped in) to the inside of the plate, just to be extra-cautious.
At this point, you should be ready to test your buttons out. Make sure the wires are all connected to the correct button (i.e., the buttons execute the correct actions in-game). If any of them act like they're always pressed until you actually press the button (i.e., its response is backwards), then you've attached the wire to the wrong post.

Step 9: Replace the bottom plate

Once you're sure everything works properly, just cram your wires into place and screw the bottom back on. With the spacer, the screws should be just long enough to catch if you press firmly on the bottom plate. However, they probably won't be able to hold the rubber feet in place securely and you'll probably lose them (though I imagine most of you are like me and have long since lost those rubber feet anyway).

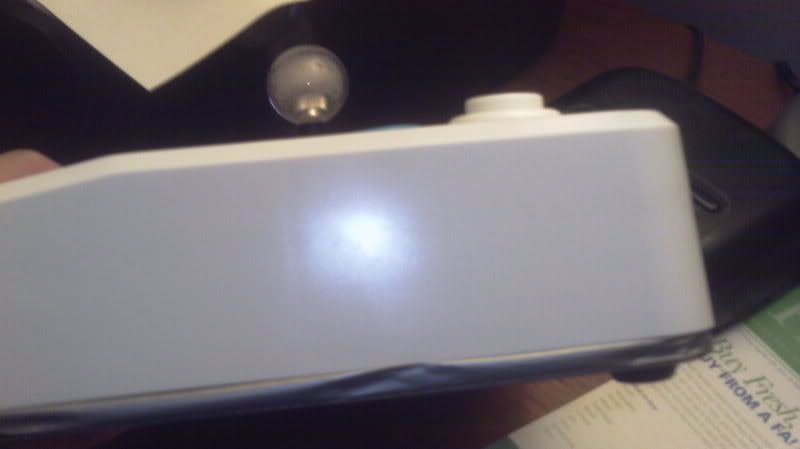
Here's what it looks like from the side. Yes, the cardboard is visible (though not particularly noticeable), and yes, people will probably make fun of you for it.
If you have any questions about the process, hit me up in the comments.

UPDATE: Reader sfkingalpha had the clever idea of covering the cardboard edge with duct tape, which greatly improves the appearance compared with nekkid cardboard:
"Aside from aesthetics, I think this also helps with air tightness and cardboard deterioration!"
Looks great, sfkingalpha!

He was also able to keep his rubber feet by getting longer screws, specifically 3/4 SS panheads.

Here's his finished product:

Analytics Tracking Footer